
Safes
Creating a Safe
In order to create a new Safe, follow the instruction:
- Click + icon in the main menu next to the Safes tab, or
Select Management > Safes and then click Add. - Enter object’s name.
- Select Blocked option to disable access to object after it’s created.
- Select the Login reason option to display prompt upon logging in, asking user to enter login reason.
- Select the Access request required votes option and provide a number of the voters. This option enables a so called Just-In-Time feature that allows defining and scheduling the time when a user is allowed to access specific resources for a set period of time. The user sends requests via the Access Gateway and the administrators accept or reject them on the Admin Panel. Read more about the Just-In-Time feature on the Access requests topic.
- From the Note access drop-down list, select access rights to account related notes:
read-only accessorwrite access. Notes can be accessed either from the account edit form or in the Access Gateway. - Select the Session time limit option and input a minutes value.
- Select the Session inactivity limit option and input a minutes value.
- The OTP in Access Gateway option is enabled by default and is responsible for generating OTP in the Access Gateway.
Disabling the OTP in Access Gateway option makes impossible connecting via the Native Client or Web Client.
- Select the Web Client option to allow connecting to the session in browser.
The Web Client option can’t be enabled when the OTP in Access Gateway option is disabled.
- Select the Backup target as a destination place for storing data. Refer to the Backups and retention topic for more information about the Backup possibilities.
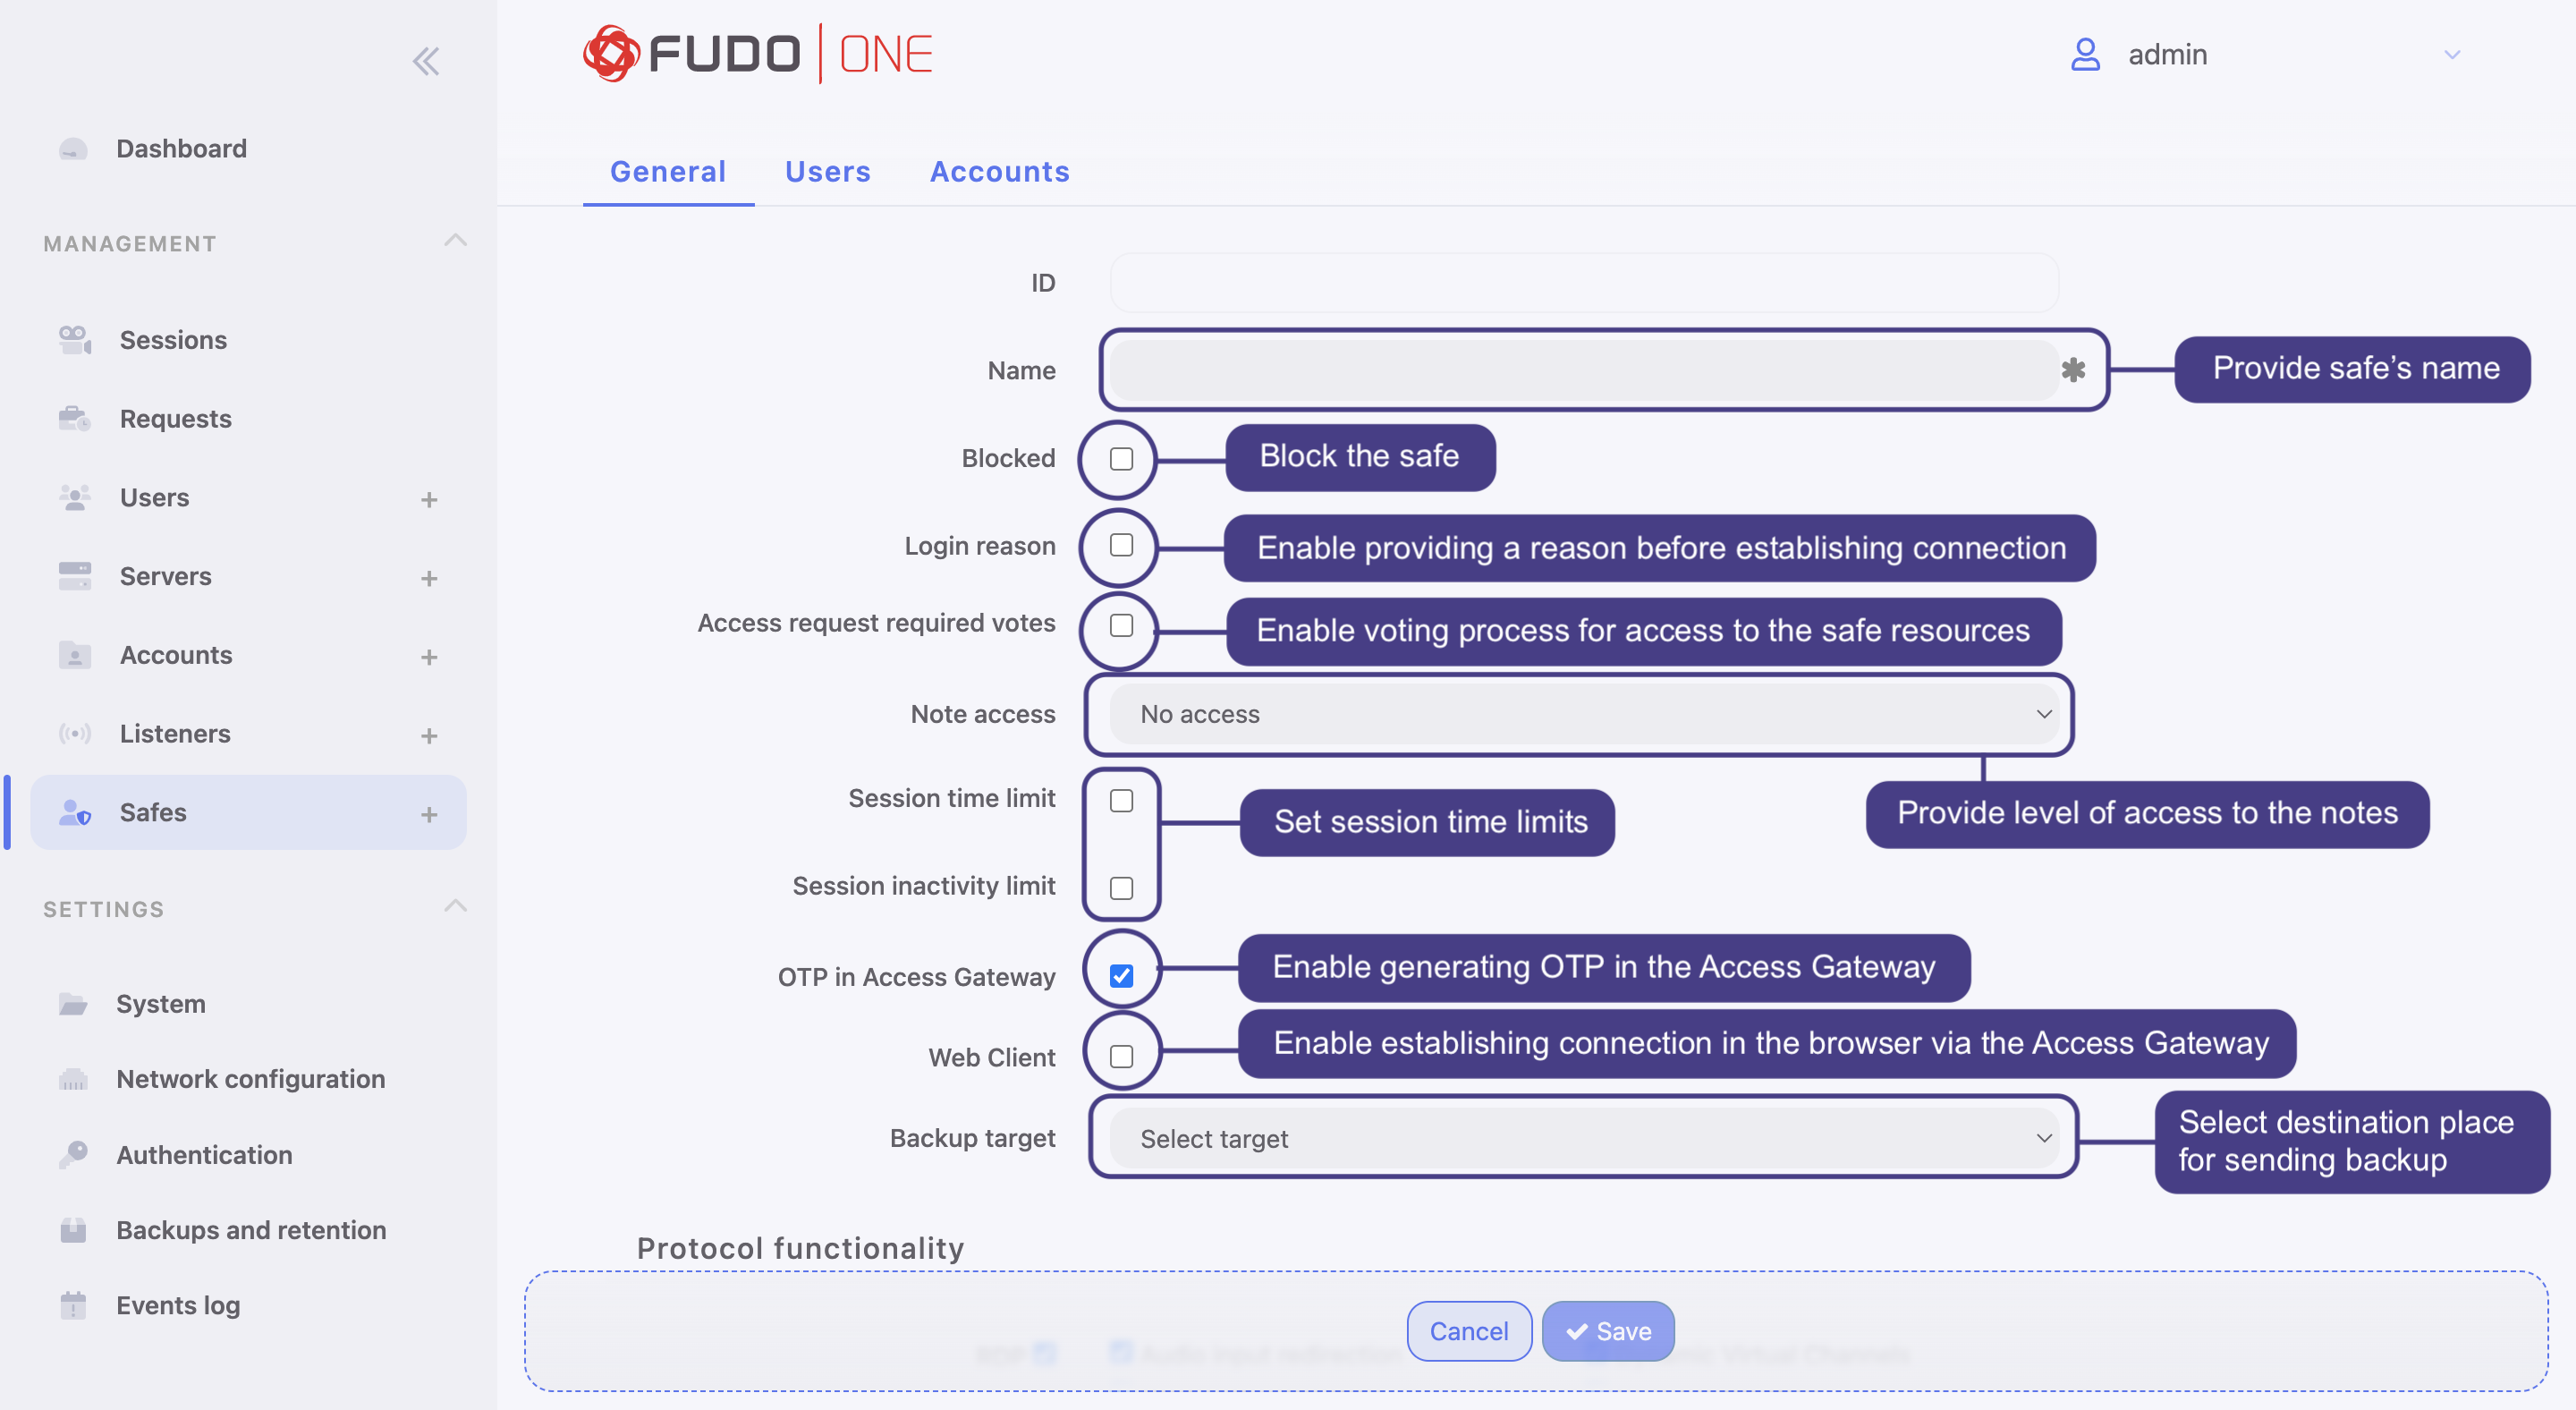
General safe settings
- In the Protocol functionality section, select allowed protocols’ features.
Select Users tab to assign users allowed to access accounts assigned to this safe.
- Click Add user. Find desired users and click the respective button.
- Define safe access options:
- define the timeframe when given user can access this object,
- define daily access policy,
- disable access for selected user,
- delete selected user from the safe.
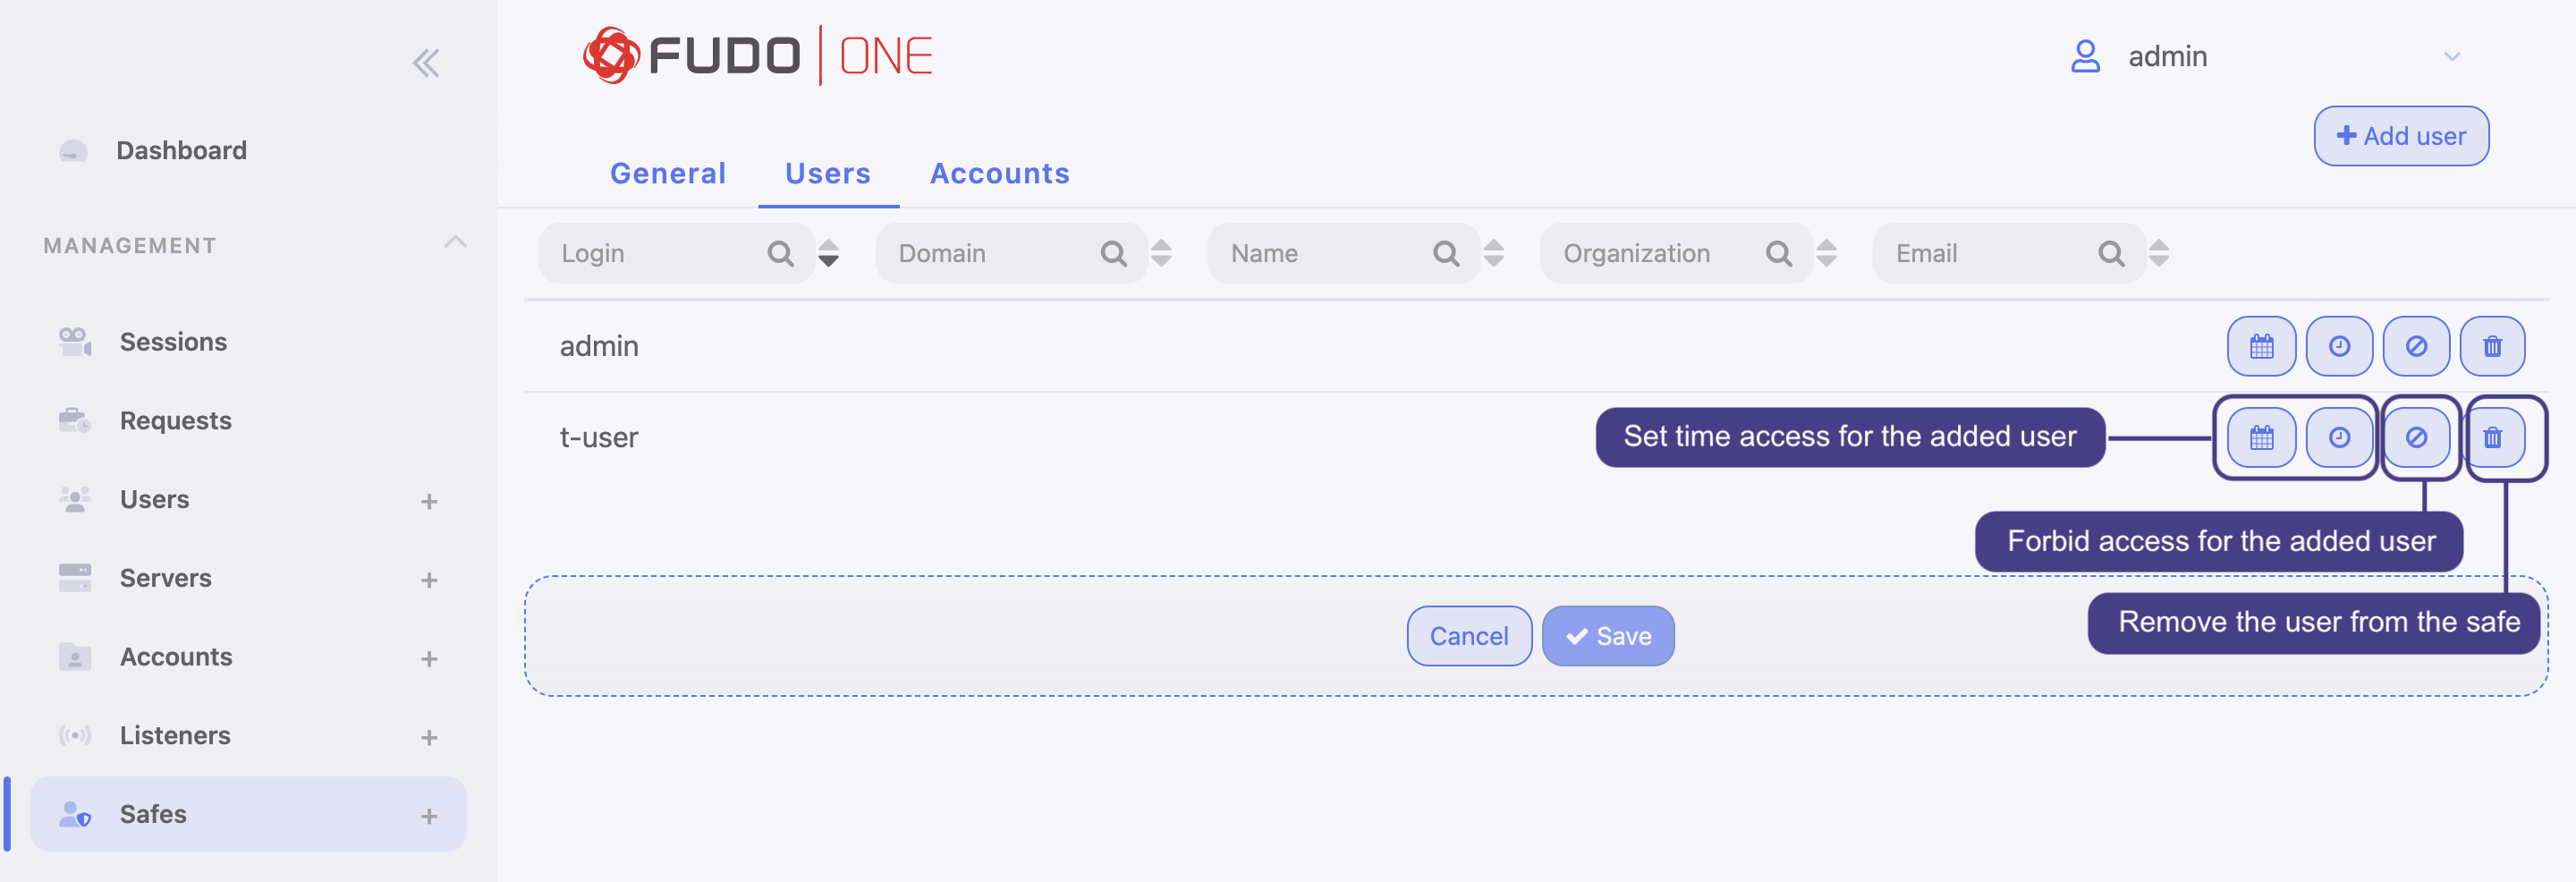
Users' safe settings
Select Accounts tab to add accounts accessible through this safe.
- Click Add account. Find desired accounts and click the respective button.
- Assign listeners to accounts. Find desired listeners and click the respective button.
- A listener cannot link to an account that is assigned to a server with a different protocol than the one defined in the listener.
- A listener cannot link to two regular or forward type accounts to the same server with the same protocol as the listener’s protocol, to which a single user has access.
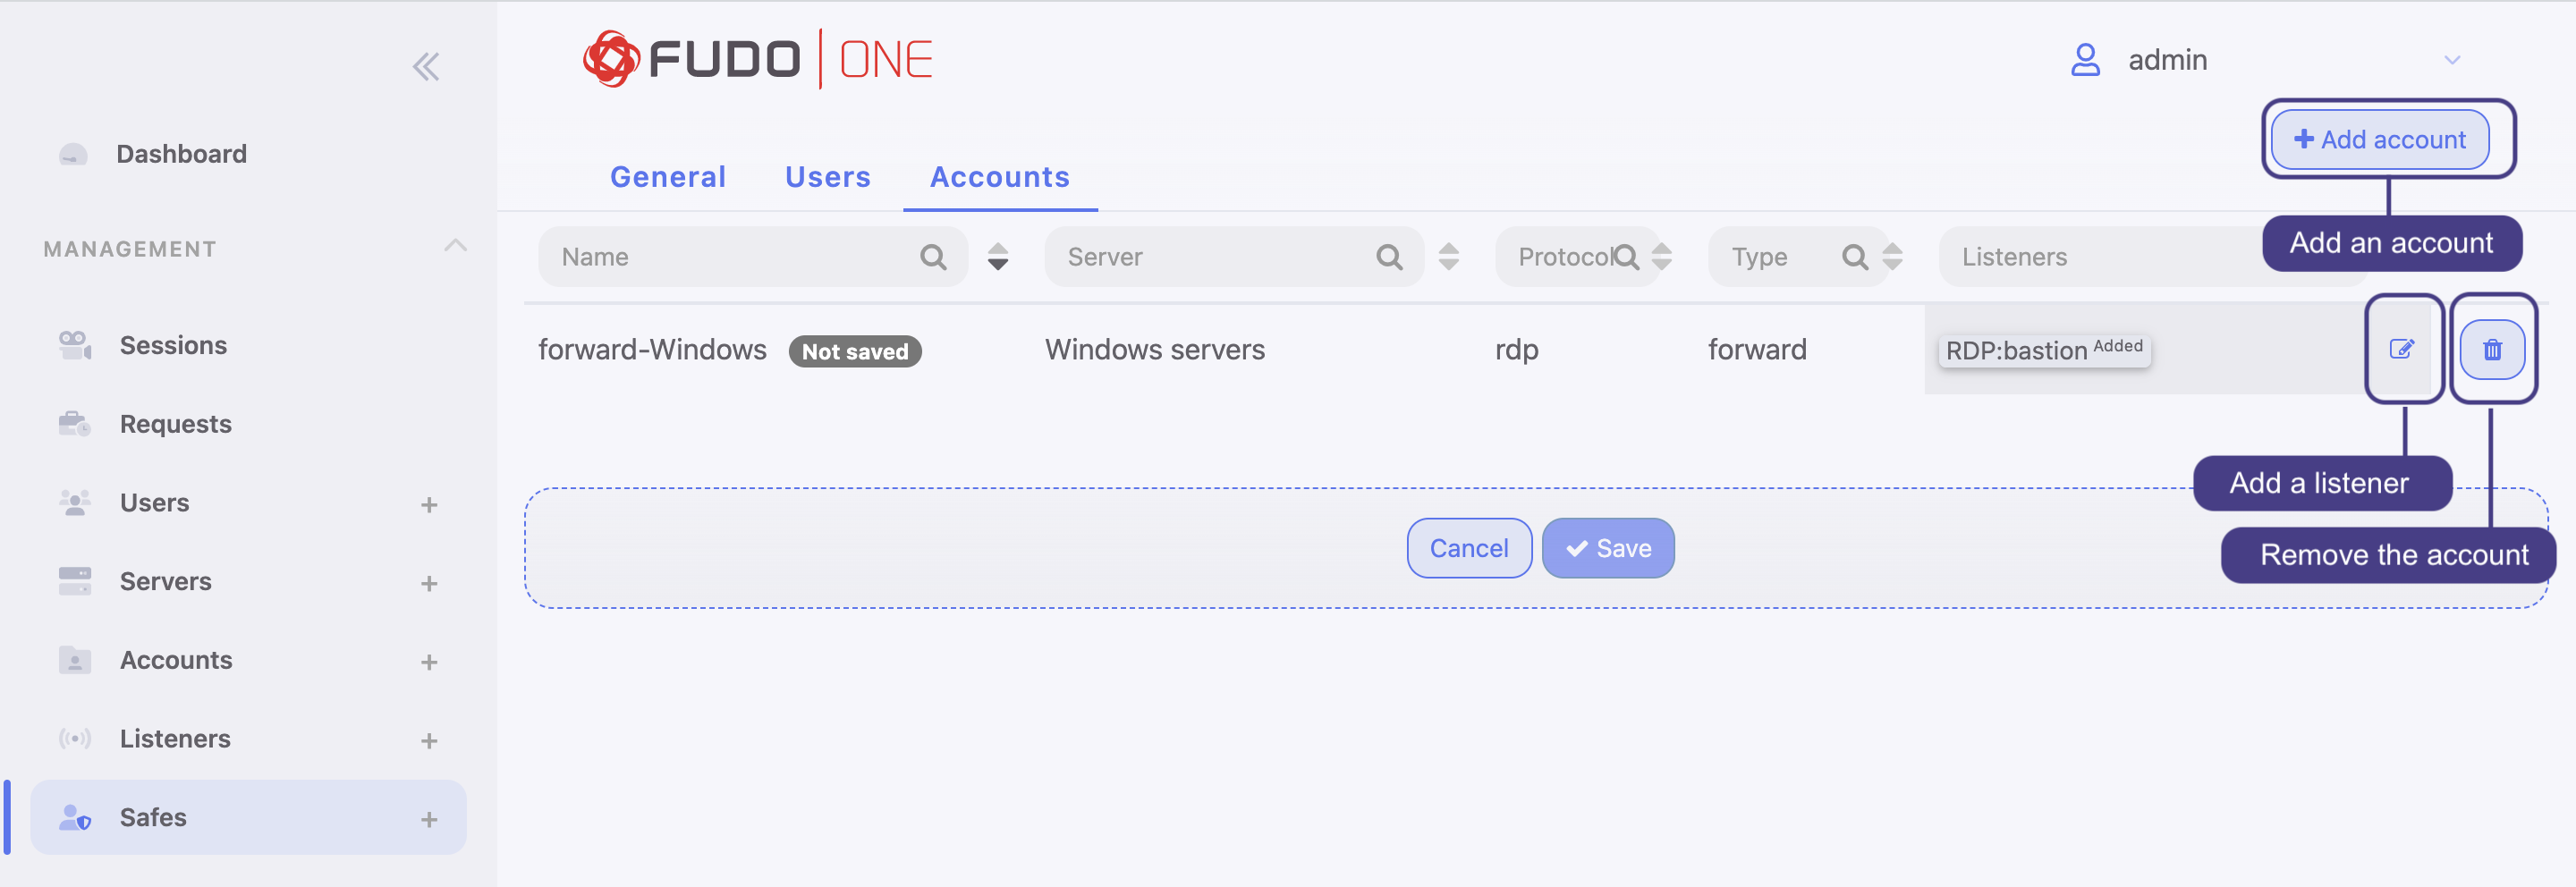
Accounts' safe settings
- Click Save.
Blocking a Safe
In order to block a Safe, follow the instruction:
- Select Management > Safes.
- Define filters to limit the number of objects displayed on the list, or use a search bar.
- Select the safe(s) you want to block and click the Block button.
- Optionally, provide the reason and click the Confirm button.
Alternatively, enter the Safe definition edit mode and click the Blocked button there. Provide an optional blocking reason.
Click Save.
Unblocking a Safe
In order to unblock a Safe, follow the instruction:
- Select Management > Safes.
- Define filters to limit the number of objects displayed on the list, or use a search bar
- Select the safe(s) and click Unblock.
- Click Confirm to unblock selected Safe objects.
A Listener object can also be unblocked from the Safe definition edit mode:
- Find the Safe object and open its definition.
- Uncheck the Blocked option.
- Click Save.
Deleting a Safe
In order to delete a Safe, follow the instruction:
- Select Management > Safes.
- Define filters to limit the number of objects displayed on the list.
- Select the safe(s) and click Delete.
- Click Confirm to remove selected Safe objects.
Updated about 1 year ago