
Create Safe
Safe is the central data model object. It regulates User access to the monitored Servers by specifying privileged Accounts on monitored Servers along with the Listeners, which determine the actual connection parameters (e.g. IP address, port number) depending on the given protocol.
In order to create a new Safe, follow the instruction:
- Select Management > Safes and then click + Add.
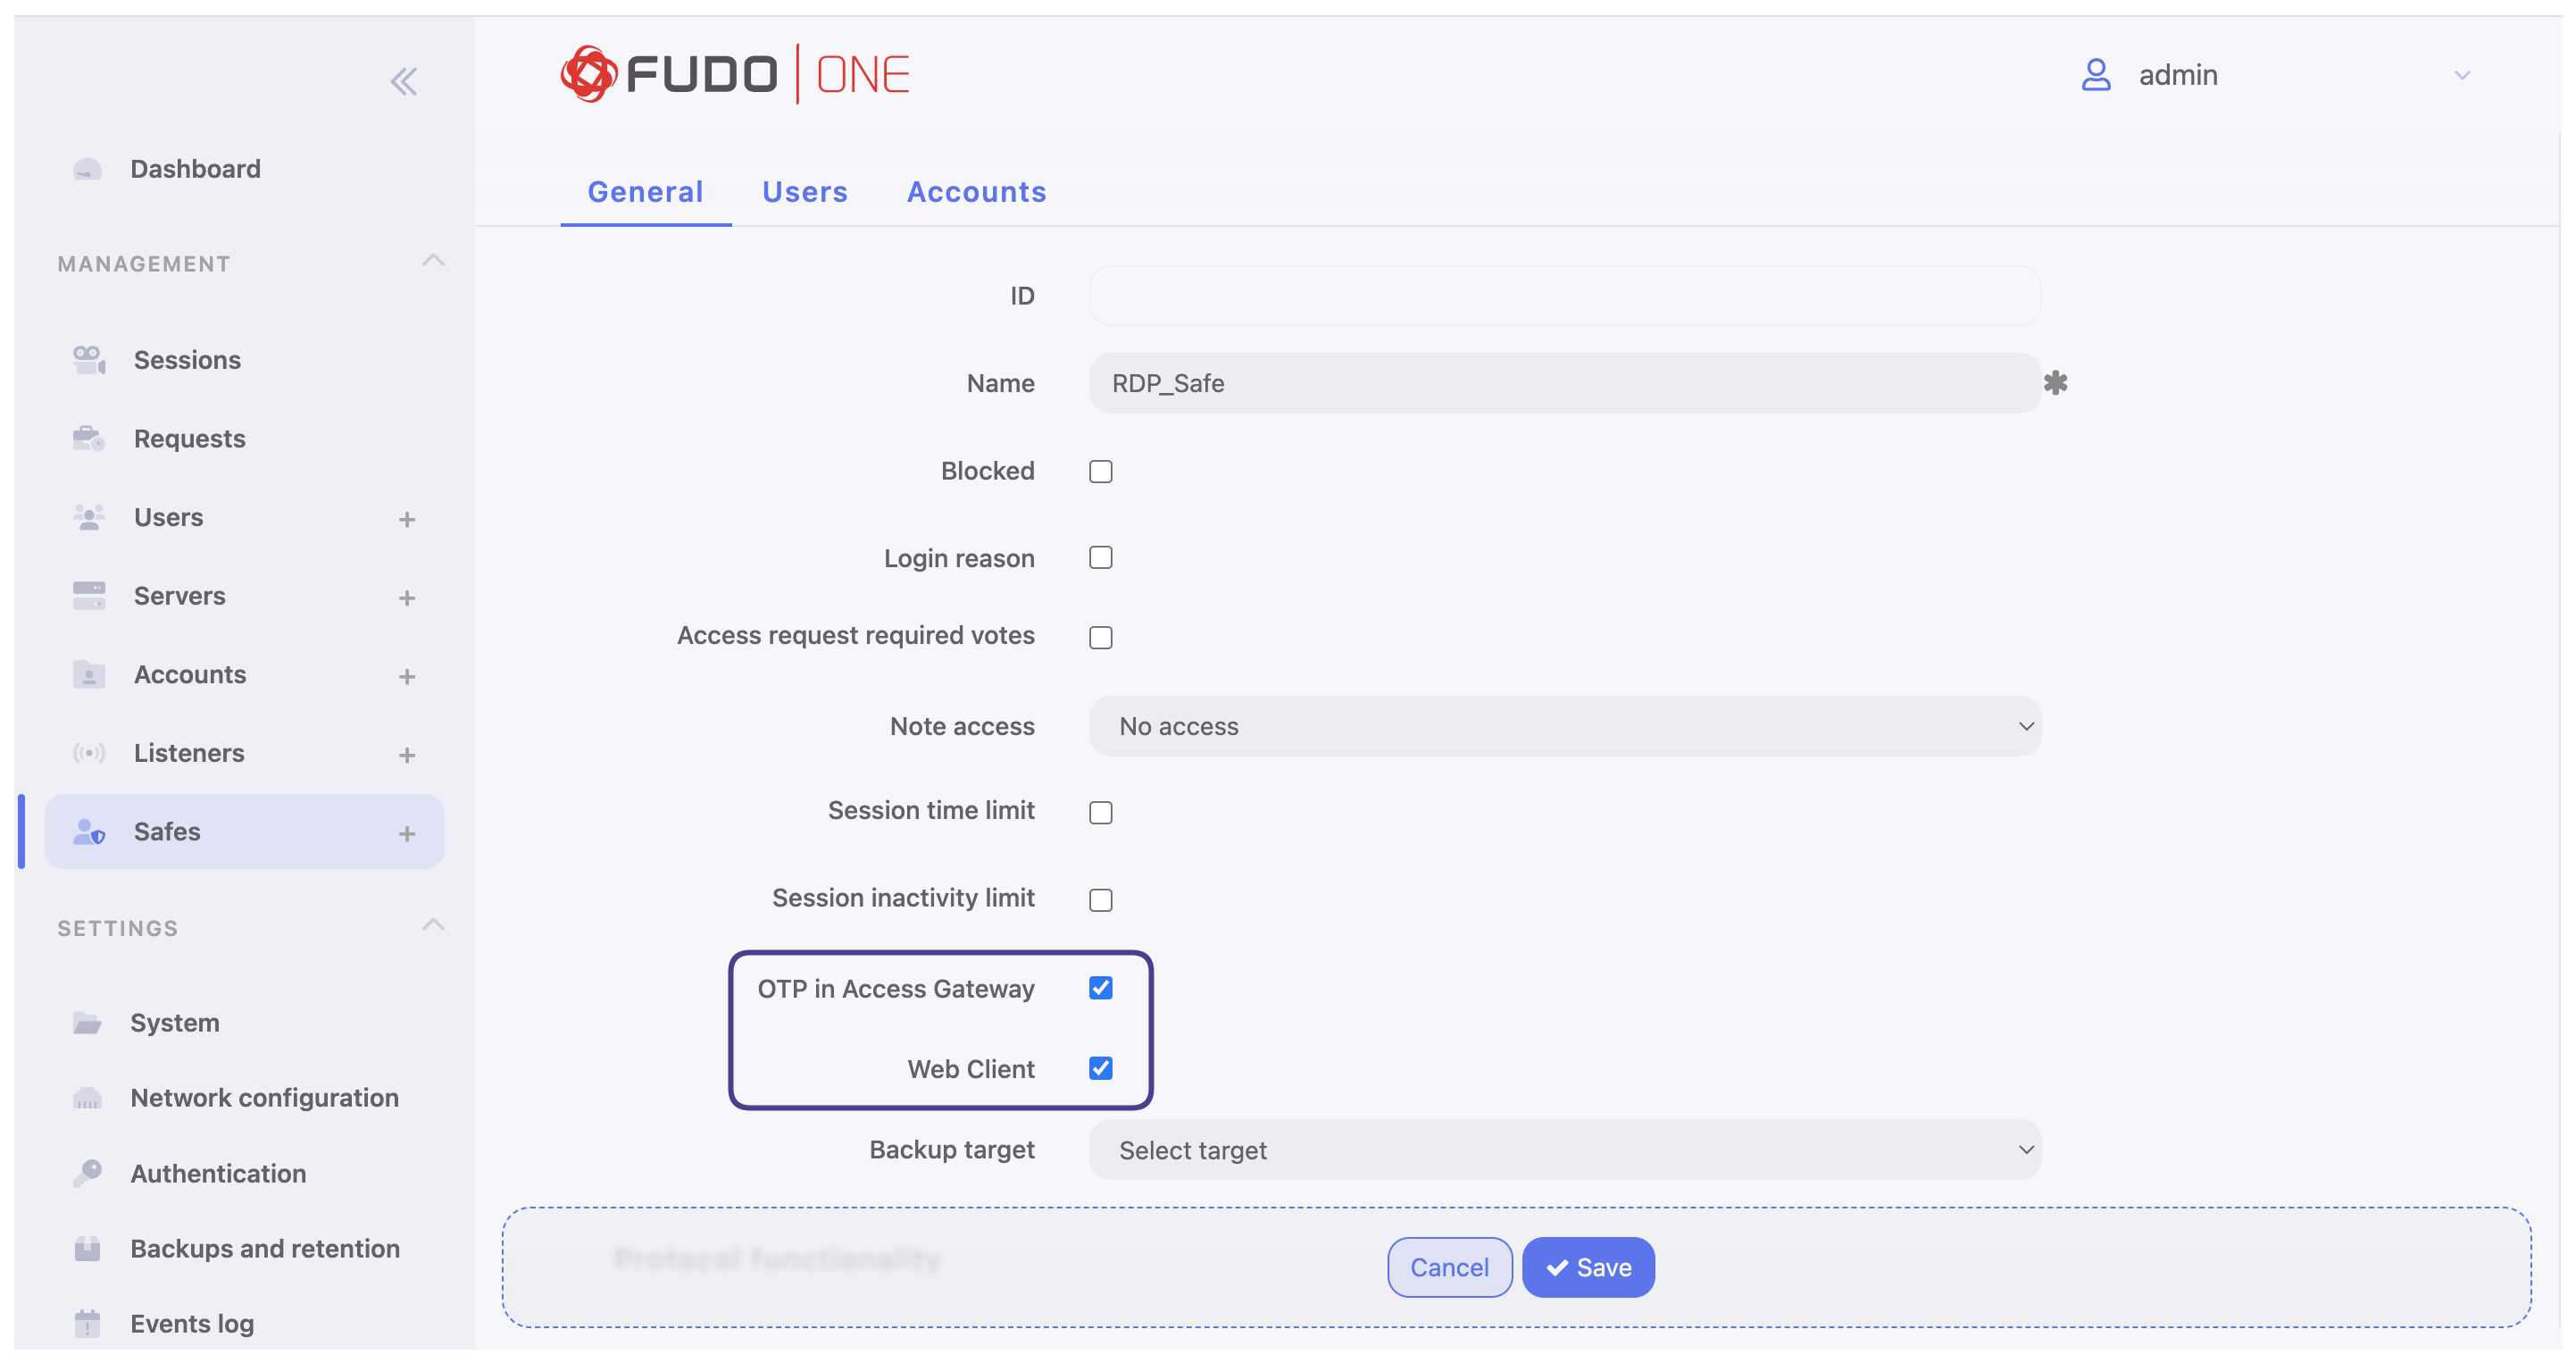
- Enter object’s name that will help you distinguish it within the Fudo One system (e.g.,
RDP_Safe). - The OTP in Access Gateway option is enabled by default and is responsible for generating OTP in the Access Gateway.
- Select the Web Client option to enable session initiation via a browser (we will use this method later to establish a connection directly from a browser).
- Navigate to the Users tab to assign the previously created
FudoUser, allowing it access to accounts that will be linked to this safe.- Click + Add user and click the + button next to the
FudoUsername. - Click ✔ ok.
- Click + Add user and click the + button next to the
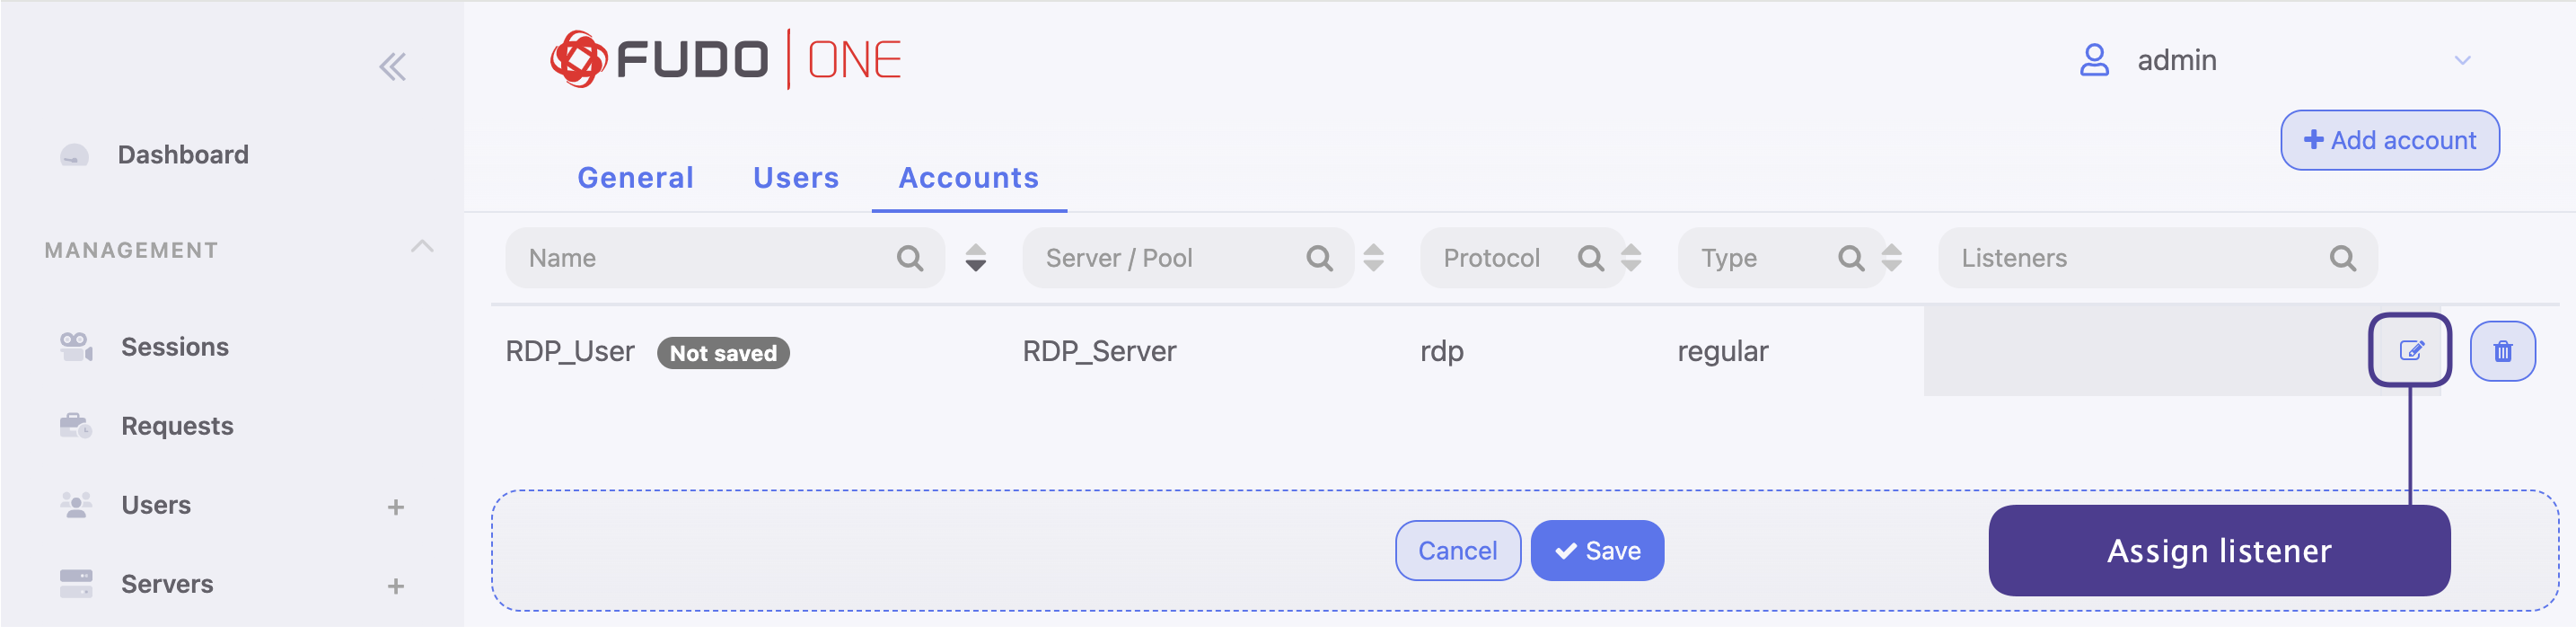
- Navigate to the Accounts tab to add account accessible through this safe.
- Click + Add account and click the + button next to the
RDP_Username. - Click ✔ ok.
- Click + Add account and click the + button next to the
- Assign listener to selected account by clicking the ✎ icon next to the added account.
- Locate the
RDP_Listeneryou created in the previous steps or the defaultRDP:bastionlistener and click the + button next to its name. - Click ✔ ok.
- Locate the
Protocol MatchRemember, that a listener cannot link to an account that is assigned to a server with a different protocol than the one defined in the listener.
- Click Save.
Need More Info?To learn more about Safes management, please follow the Safes section.
Updated about 1 year ago
What’s Next
After finishing this chapter, proceed to connect via Access Gateway.