
Access Requests
Granting access to the resources via the request is a basis of the Just In Time feature. A user requests for access via the Access Gateway, and authorized administrators vote for the request's approval or rejection on Admin Panel.
In order to set the voting process for access to your resources, follow the procedure:
- Select Management > Safes tab.
- Select the safe from the list, or create a new one.
- Check the Access request required votes option. Provide a number of the voters that will be deciding about each request to the safe resources.
- Users with the
Adminrole are allowed to be the voters. A user, who sent an access request isn’t allowed to vote for access on their own request. Therefore, their own requests aren’t visible for them.- Having more than one voter sets a request to be accepted by more than 1 authorized person. If one of the voters votes for rejection, the system automatically rejects the request.
- Click Save.
All the requests are available in the Management > Requests tab.
Awaiting requests
The Awaiting tab shows a detailed list of the requests that are waiting for a decision of the currently logged in user. Two types of requests are available for the user who sends an access request: immediate and scheduled.
Immediate requests can be set from now up to the next 24 hours.
When a user sends an immediate request, its access time starts when the request is accepted. Then, the user has 24 hours to start their session. When the user starts the session, the system counts the session time, which the user had requested, and terminates connection when the requested session time is over. If the user does not use the access and does not connect for 24 hours after access is granted, the access becomes expired.
For the scheduled type of requests, the user chooses a time period in the future, including exact time and date.
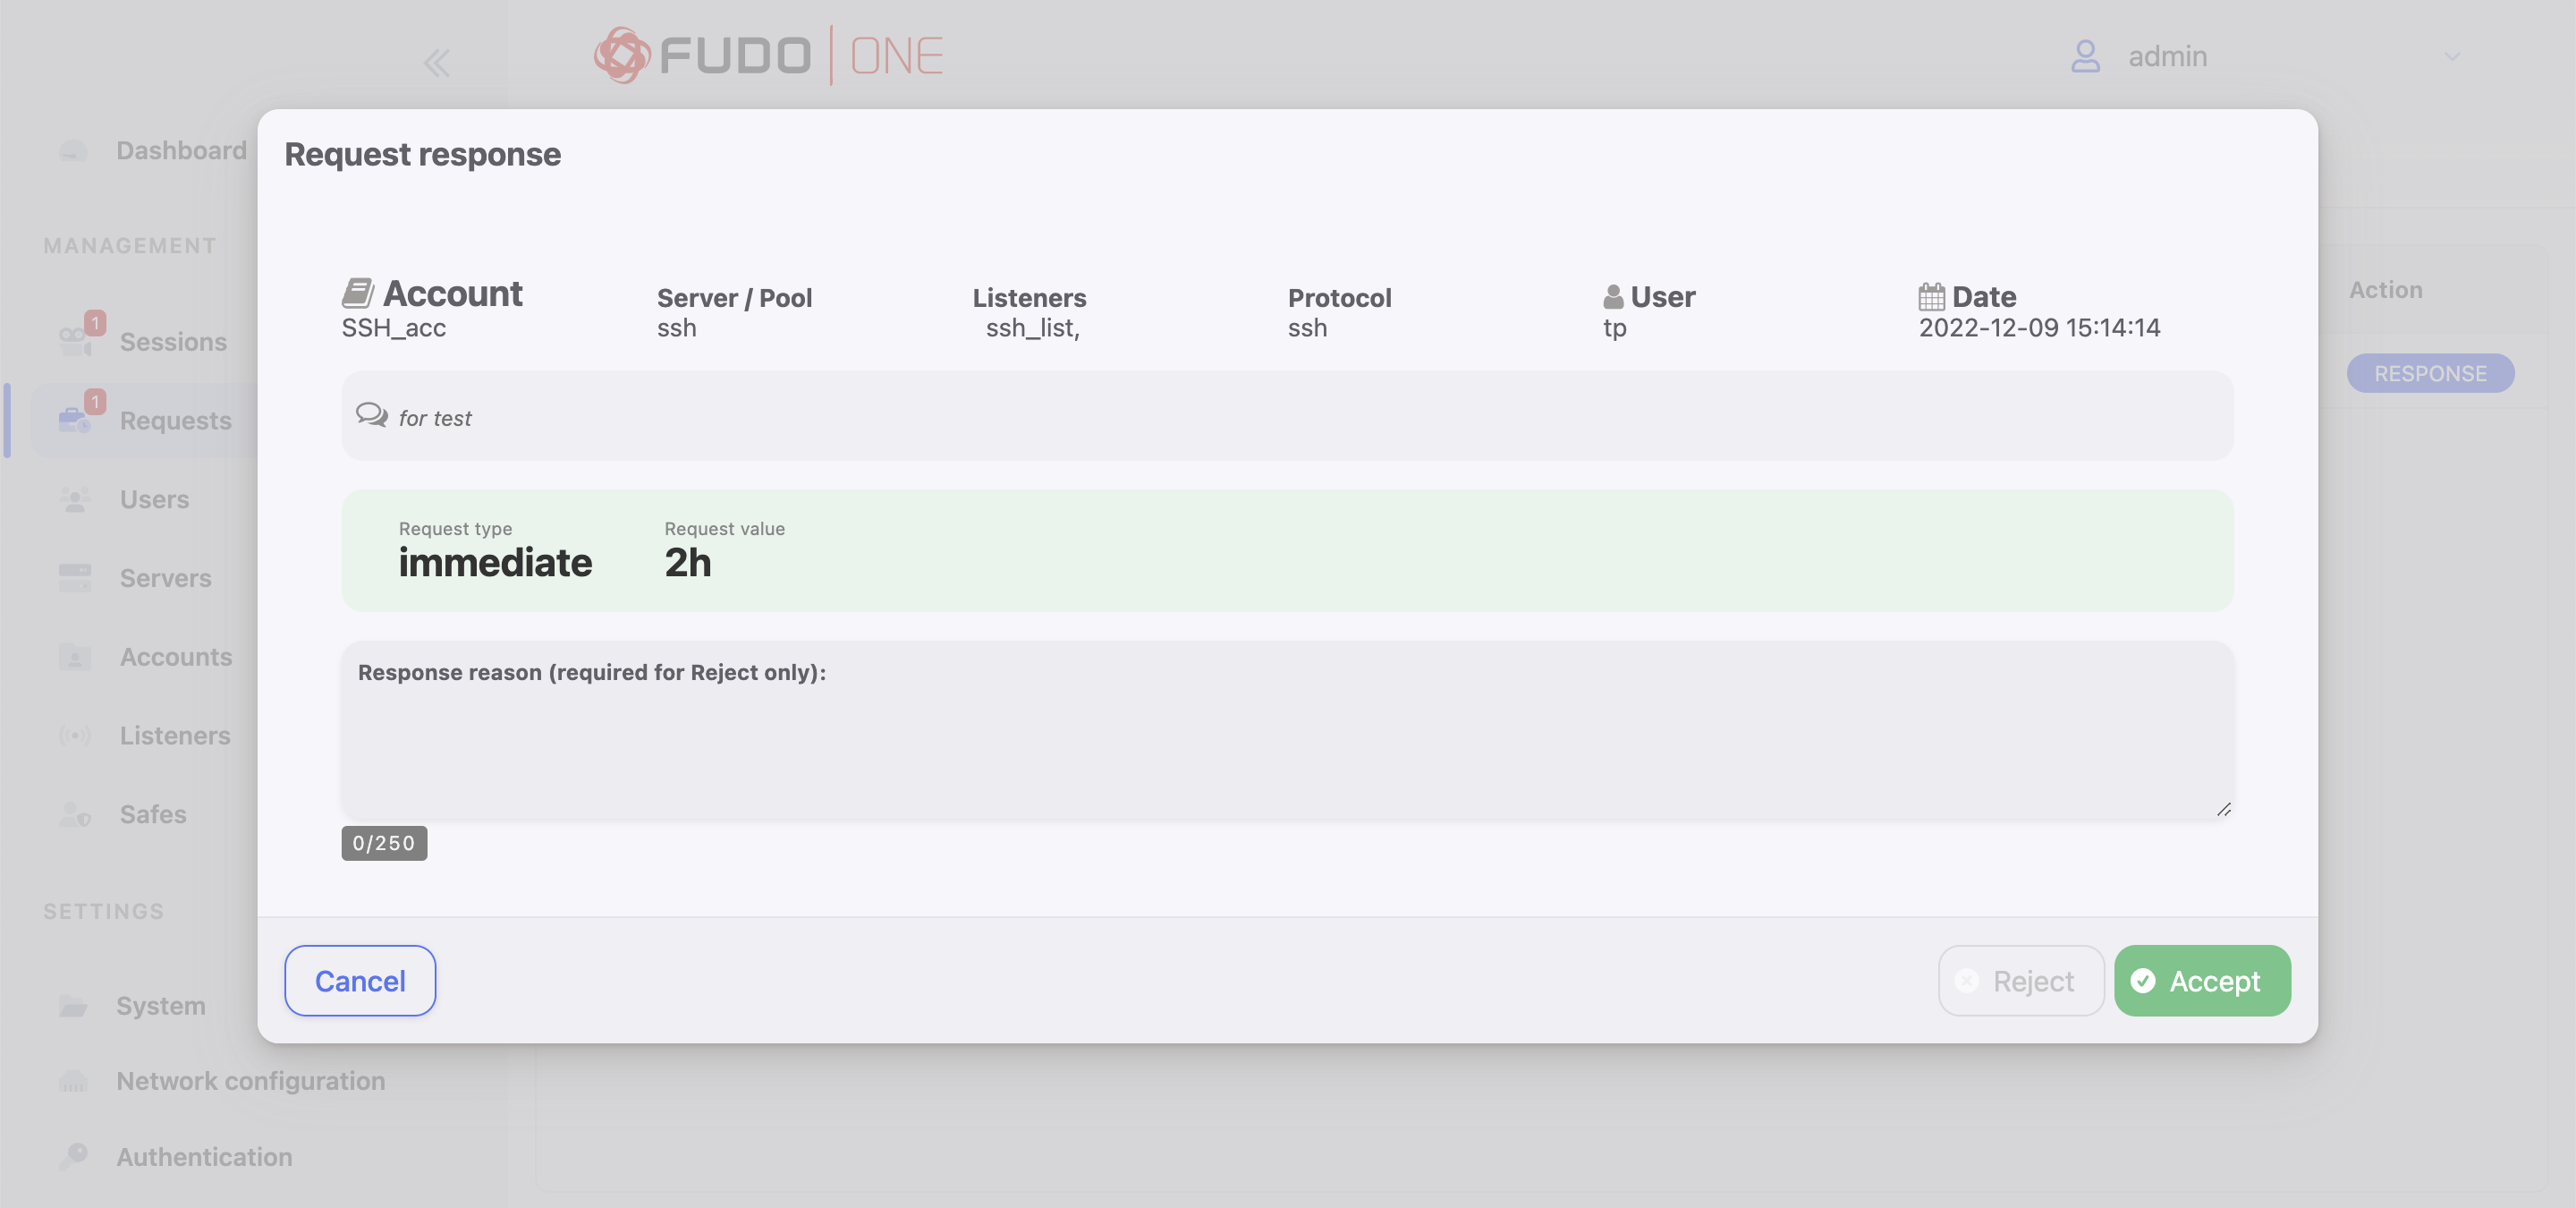
Sending response to the request
In order to vote for approval or rejection of the request, follow the steps:
- Select Management > Requests tab.
- In the Awaiting tab select the request to be processed and click the Response button .
- In the modal click the Accept or the Reject button.
The Response reason field is required to activate the rejecting option.
Awaiting request
Active requests
The Active tab shows a list of two types of the requests: 1) requests that were accepted, and their sessions are currently ongoing, and 2) requests that are waiting for the part of the voters. The Votes column of the requests list shows a number of voters that the particular request needs to be processed. Hover on its value to see the details of who had voted.
Given vote for accepted and active requests can be revoked, for example, for preventing a possible misuse. This option is useful when the user finished their work earlier than expected, but their request is still valid.
Archived requests
History of the processed requests is available under the Archive tab.
The Votes column of the requests list shows a number of voters that the particular request needed to be processed. Hover on its value to see the details of who voted.
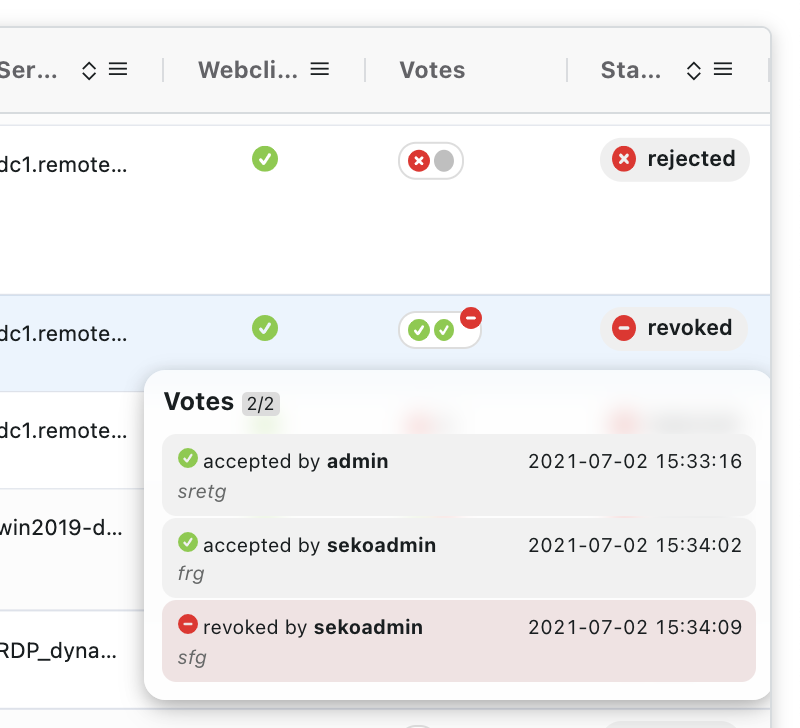
Example of the votes information of the processed request
Updated about 1 year ago