Listeners
Creating a Listener
Fudo One allows creating a Listener, based on RDP, SSH or VNC protocol.
Creating an RDP listener
In order to create an RDP Listener, follow the instruction:
- Click + icon in the main menu next to the Listeners tab, or
Select Management > Listeners and then click Add. - Enter listener’s unique name.
- Select Blocked option to disable access to servers through this listener after it’s created.
- Select
RDPfrom the Protocol drop-down list. - From the Security drop-down list, select one of the RDP connection security modes:
Enhanced RDP Security (TLS)orStandard RDP Security.
Security mode must match the security mode setting in the RDP server configuration.
- If the Enhanced RDP Security (TLS) option is chosen, select Legacy ciphers option to allow negotiating older encryption algorithms (DSA(1024), RSA(1024)) when establishing RDP connections.
- In the Announcement field, type in the announcement that will be presented to the user on the login screen.
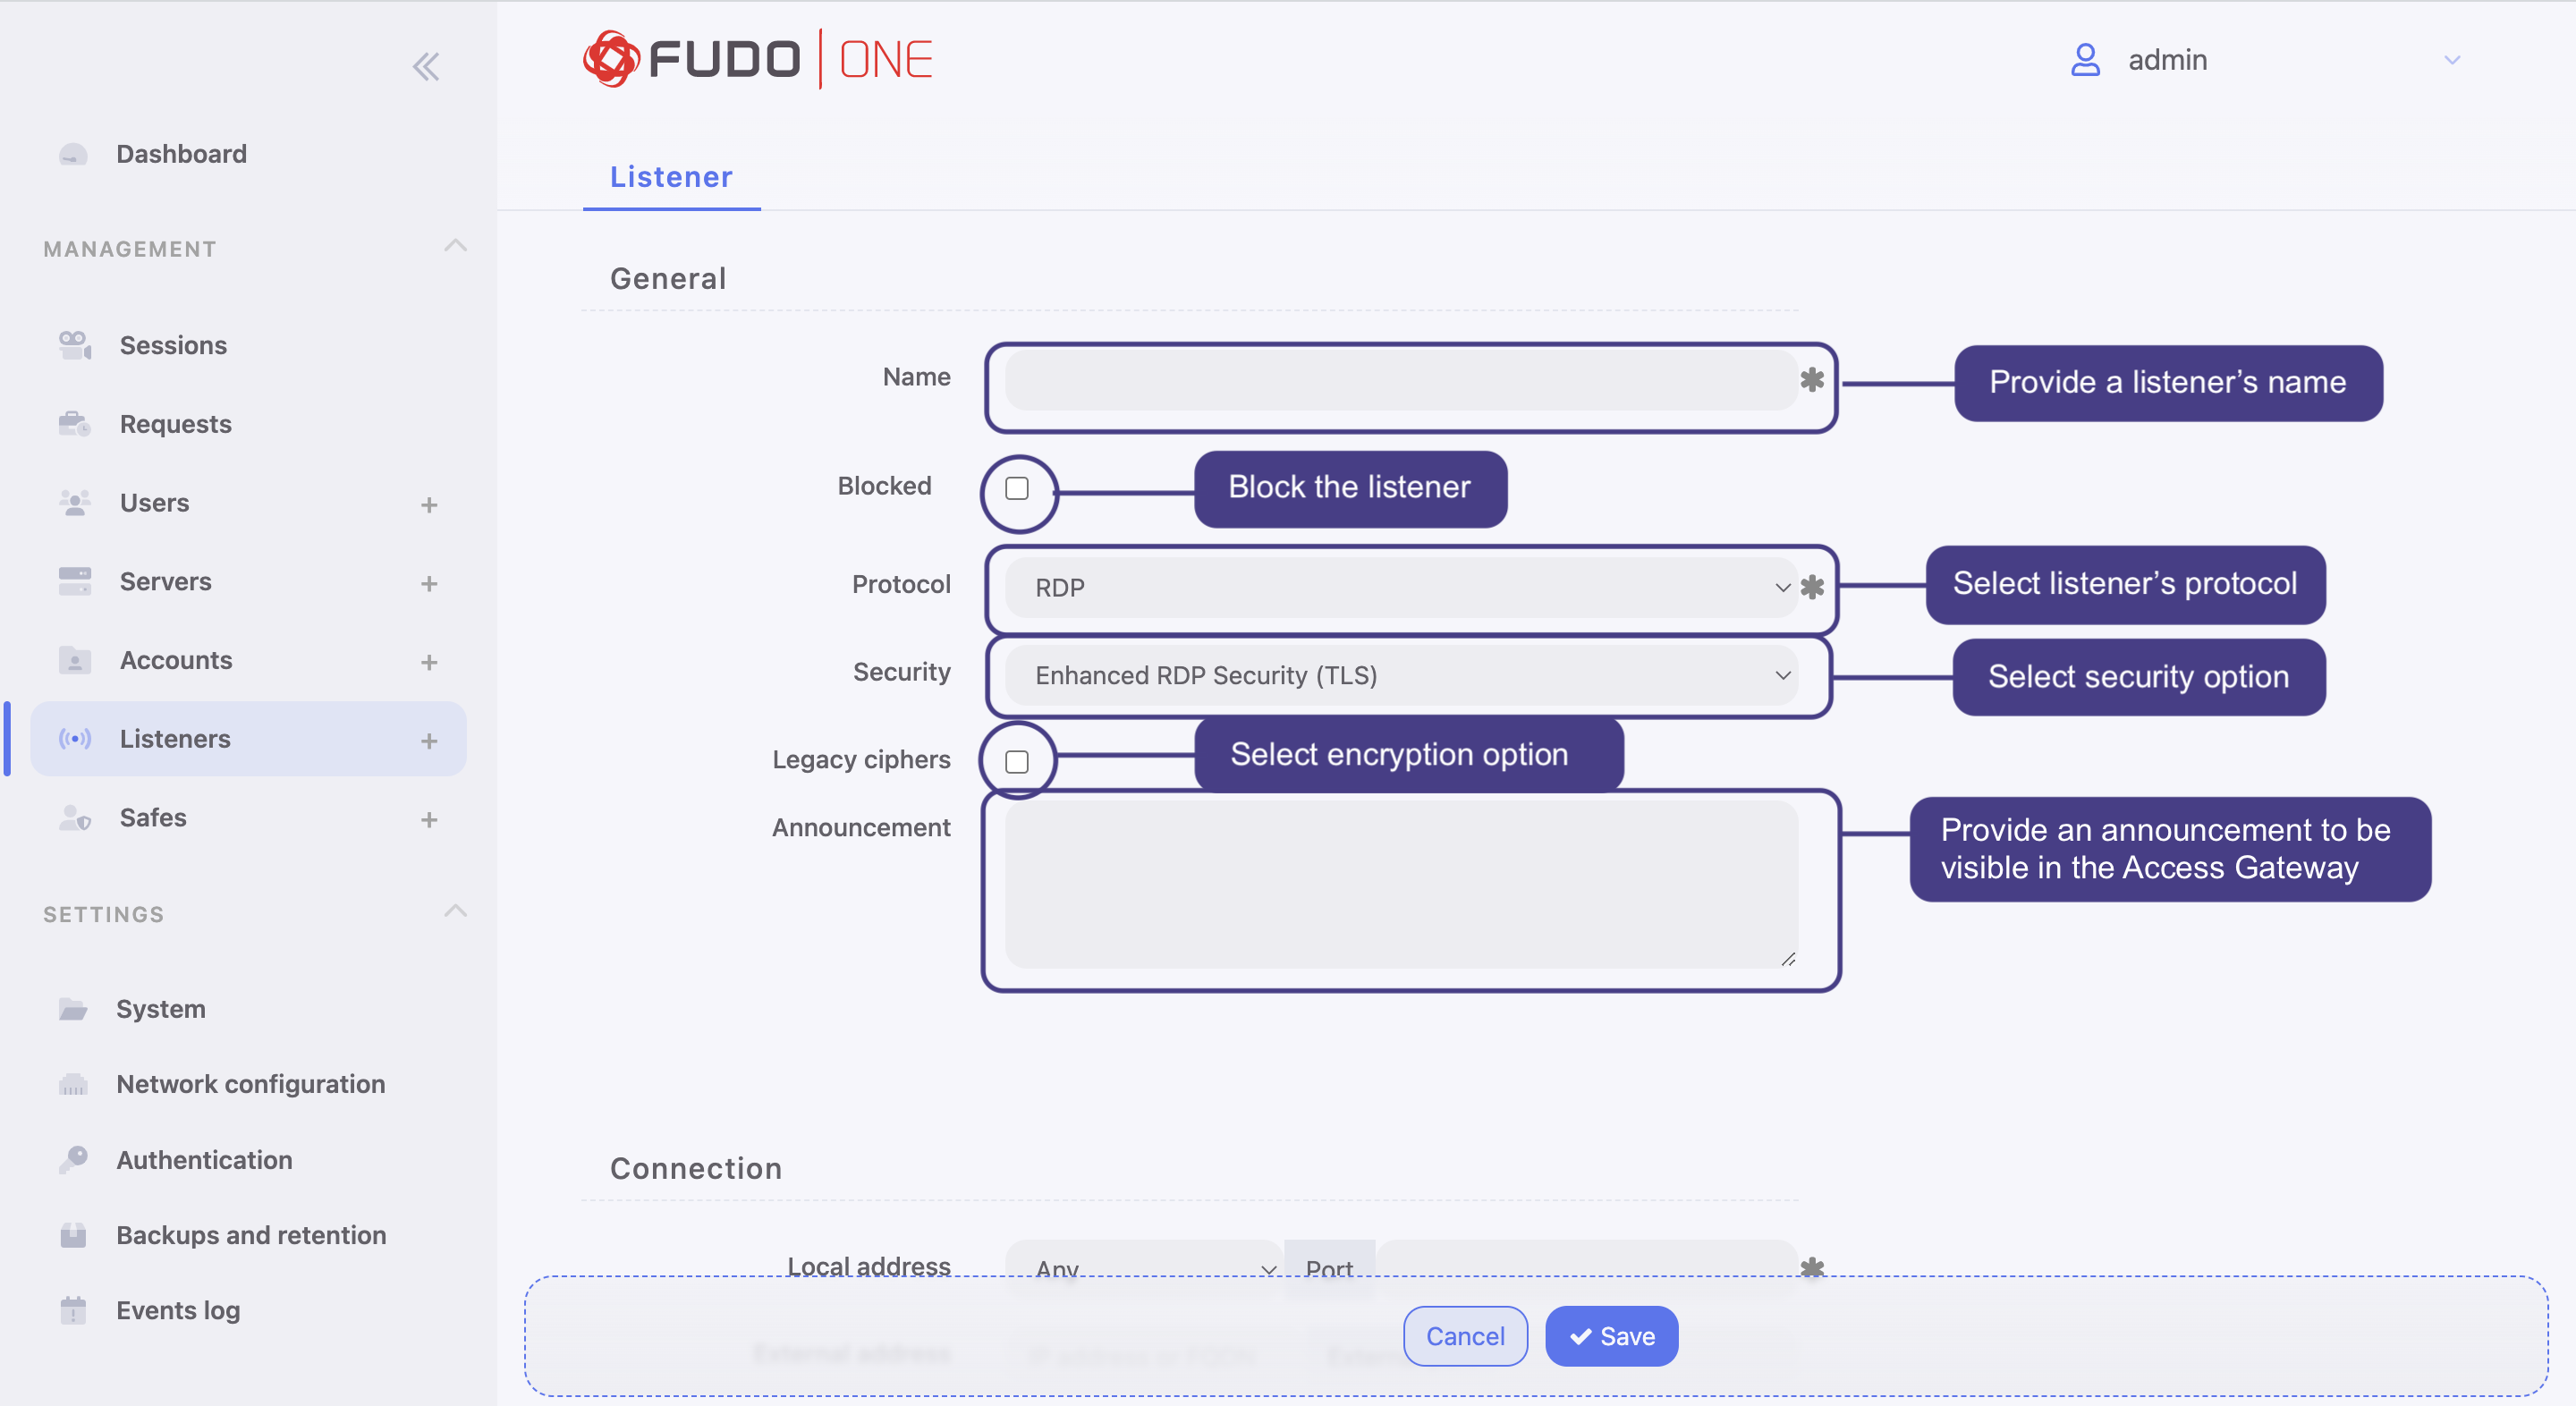
General settings of RDP listener
- In the Connection section,
- select the IP address from the Local address drop-down list and enter port number. Selecting the
Anyoption will result in Fudo listening on all configured IP addresses. - In the External address field, enter an IP address (or FQDN name) along with the port number, under which Fudo One can be accessed from outside the local network.
- If the
Enhanced RDP Security (TLS)option is selected, in the TLS certificate field, generate a TLS certificate, or upload server certificate file with private key pasted at the end of the file. Allowed format of the server certificate file is PEM, although besides .pem, accepted file extensions are .txt and .cert. - If
Standard RDP Securityoption is selected, in the Fudo public key field generate or upload respective data.
- select the IP address from the Local address drop-down list and enter port number. Selecting the
- Click Save.
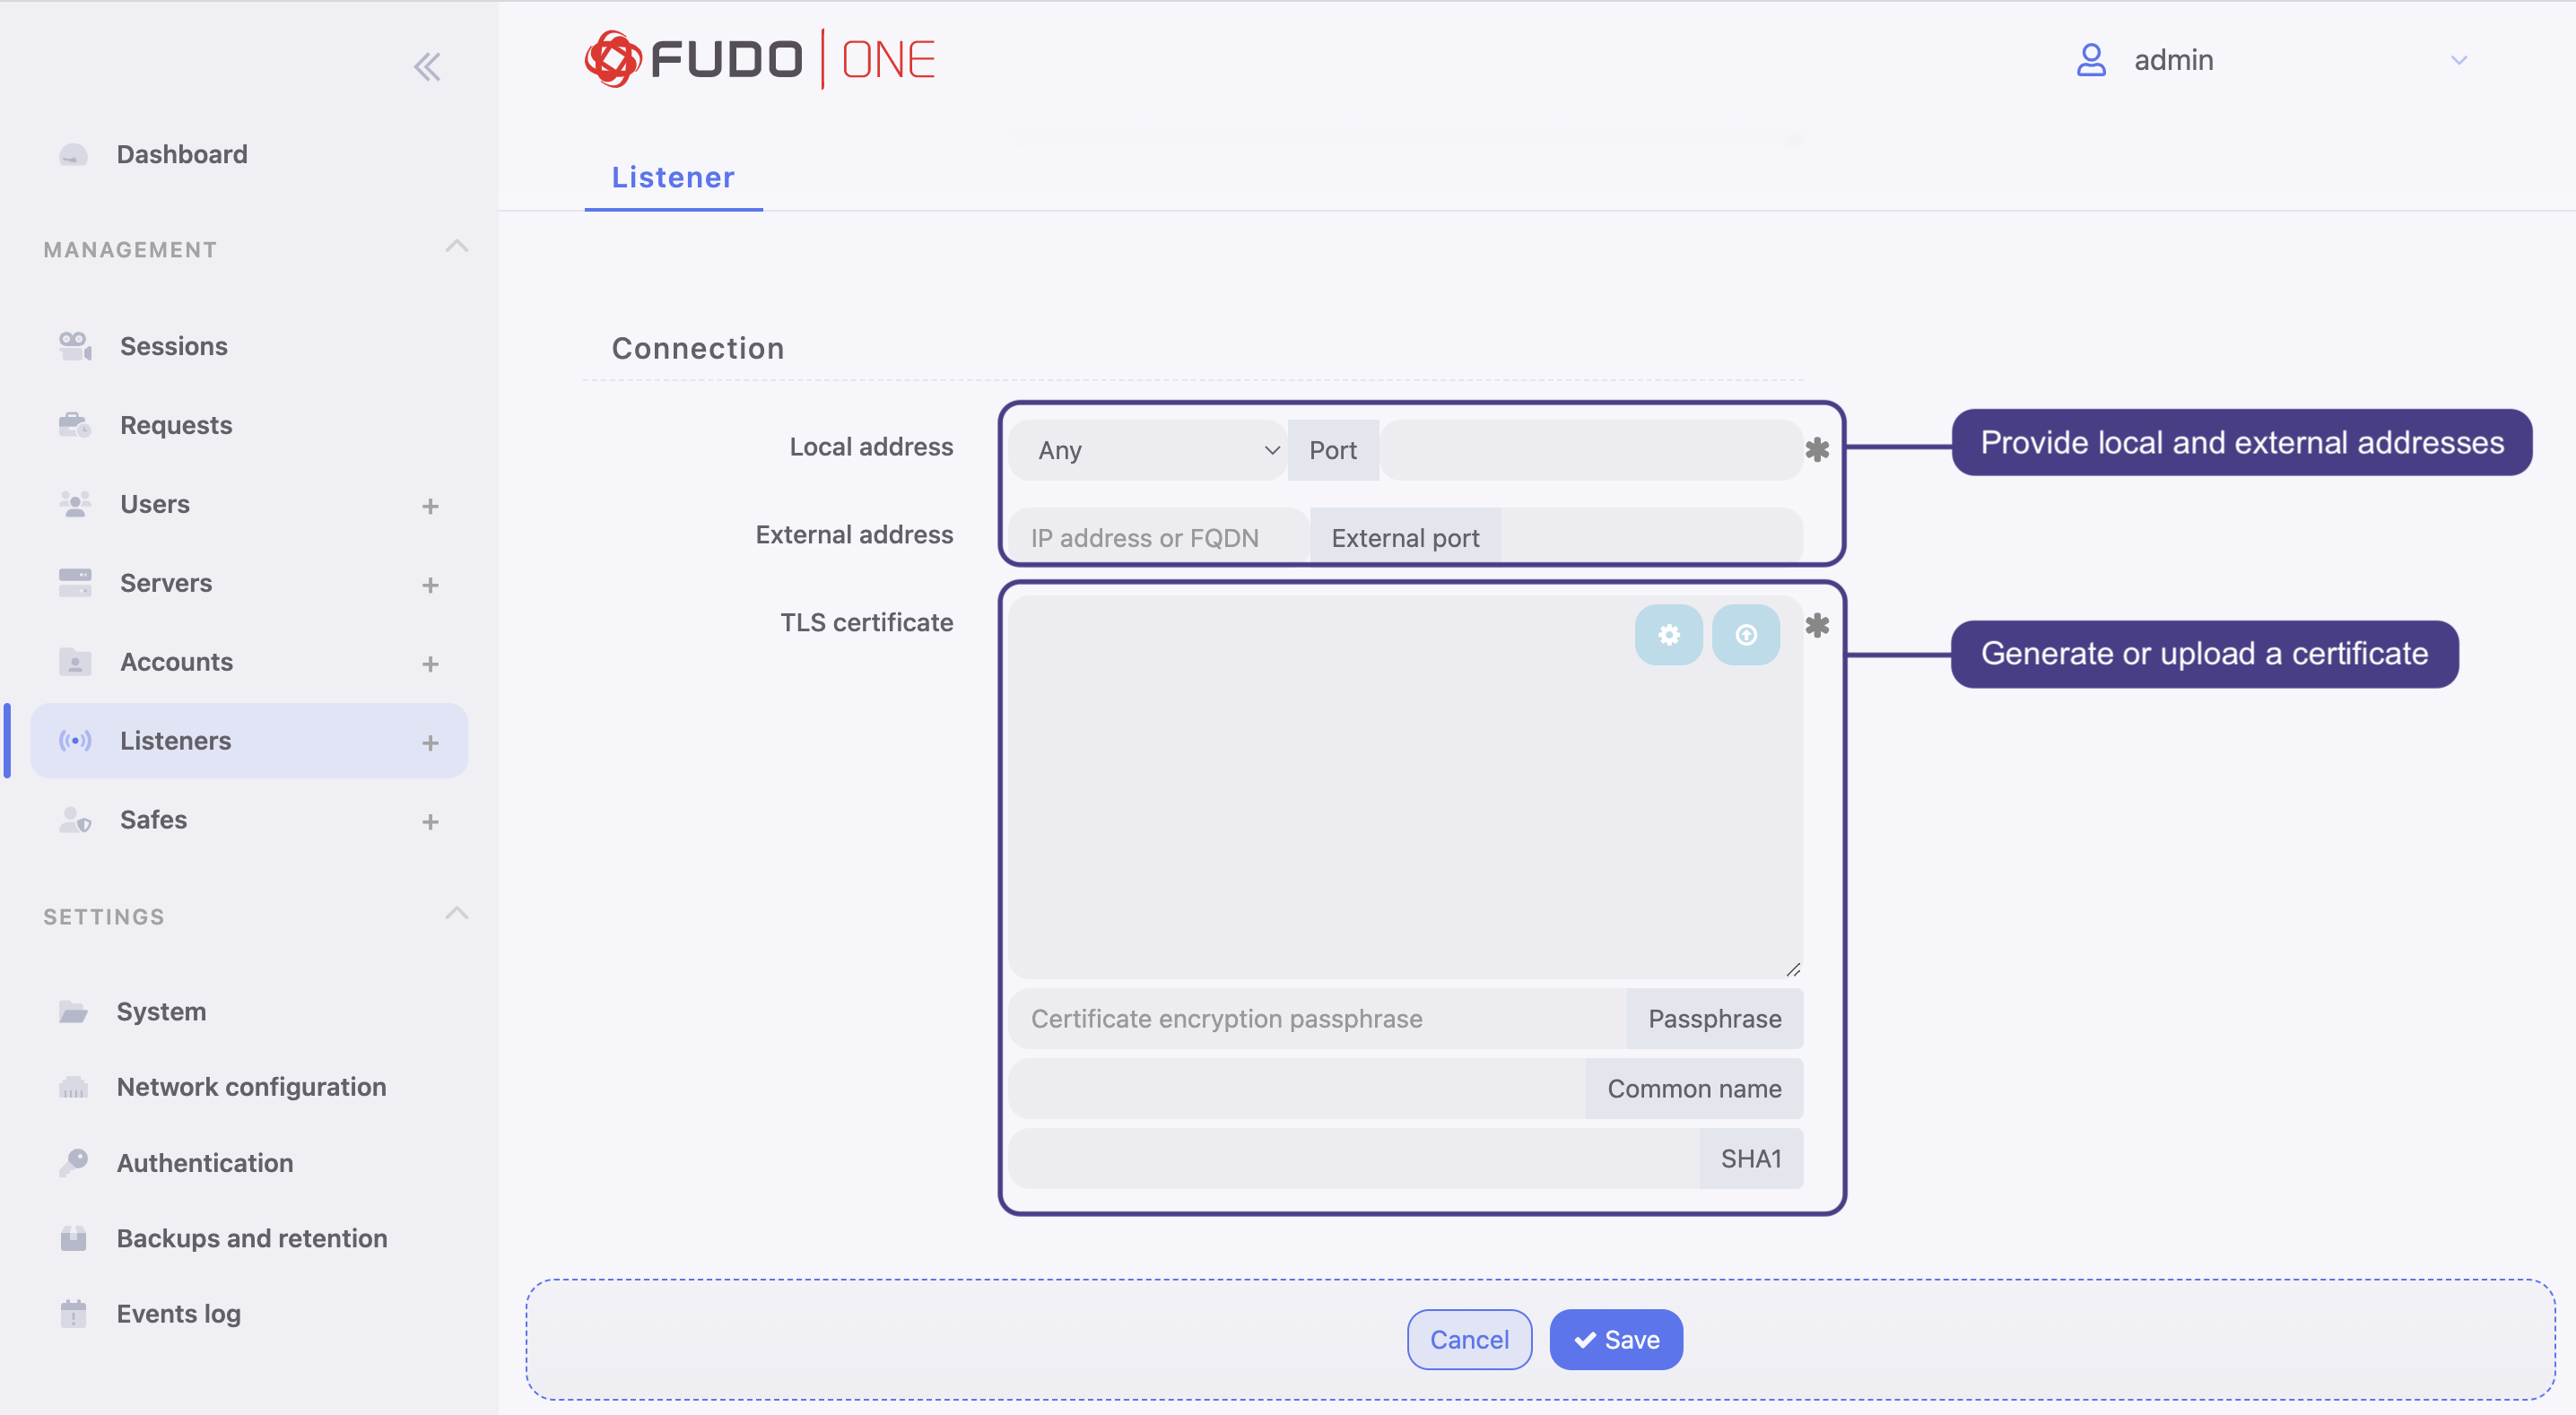
Connection settings of RDP listener
Creating an SSH listener
In order to create an SSH Listener, follow the instruction:
- Click + icon in the main menu next to the Listeners tab, or
Select Management > Listeners and then click Add. - Enter listener’s unique name.
- Select Blocked option to disable access to servers through this listener after it’s created.
- Select
SSHfrom the Protocol drop-down list. - Select the Case insensitivity option to disable case sensitivity in the username string when connecting over this listener.
- Select the ProxyJump option to allow an intermediary system to connect to the target server.
Select Legacy ciphers option to allow negotiating older encryption algorithms (DSA(1024), RSA(1024)) when establishing SSH connections. - In the Announcement field, type in the announcement that will be presented to the user on the login screen.
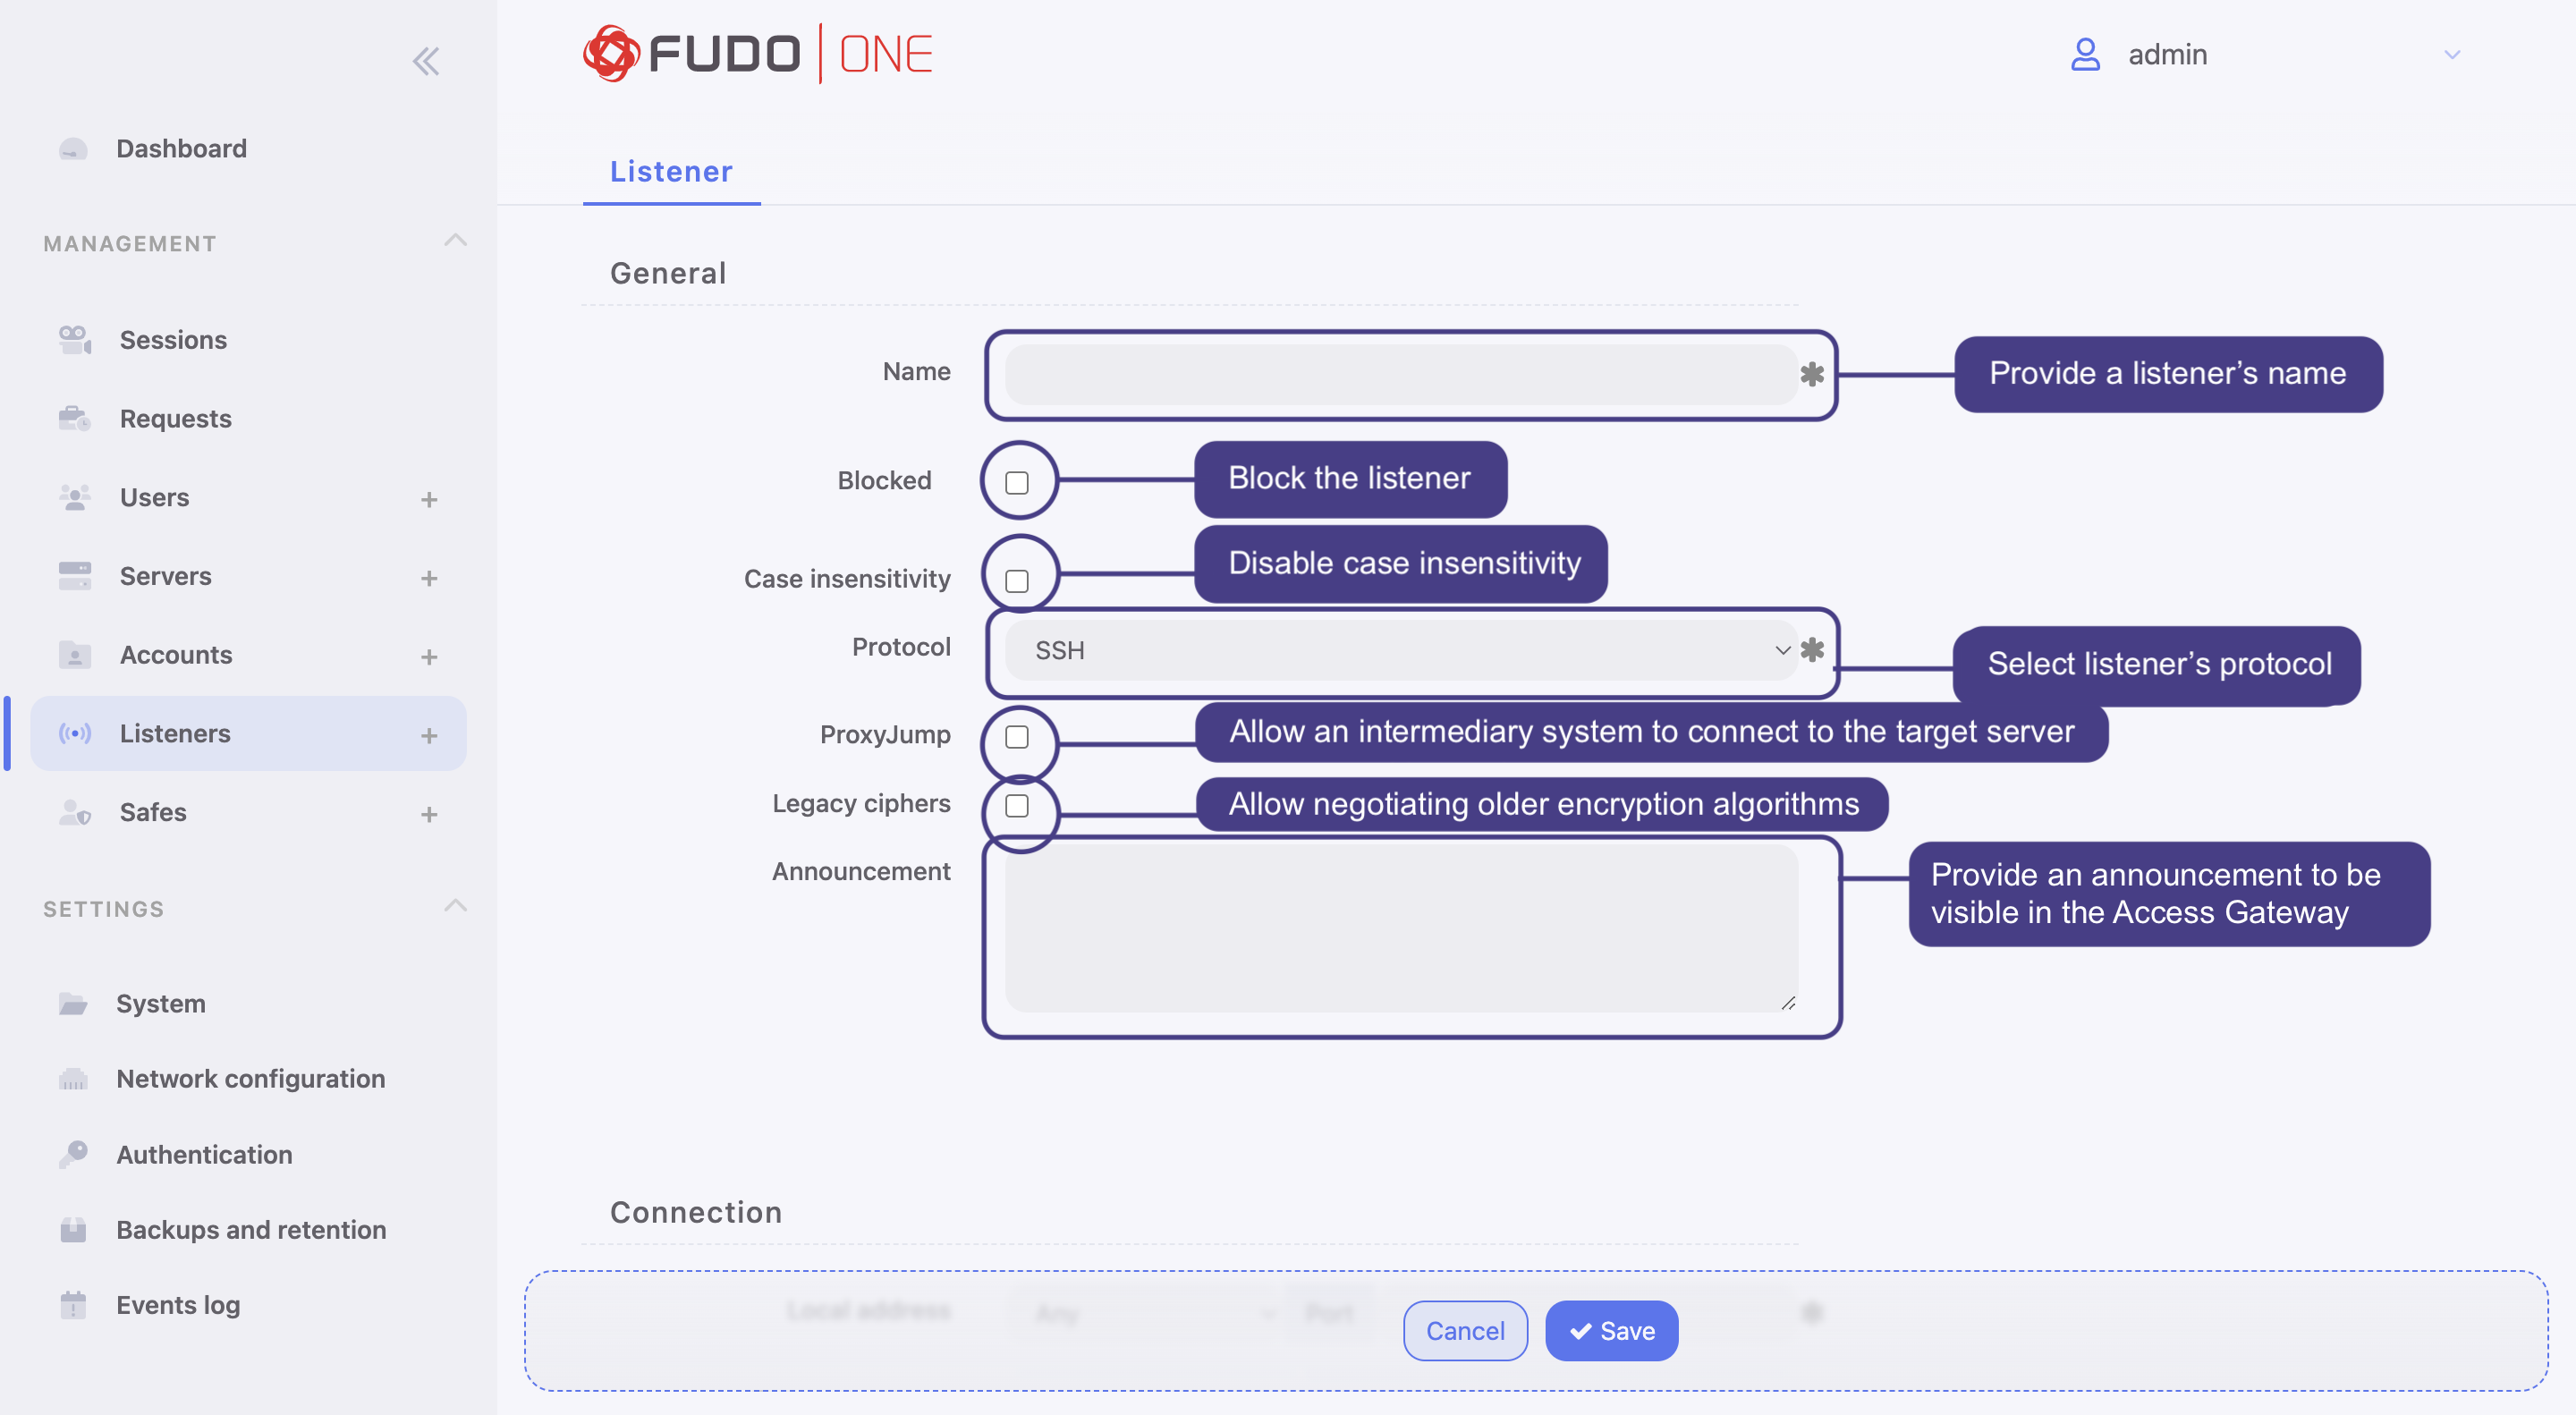
General settings of SSH listener
- In the Connection section,
- select the IP address from the Local address drop-down list and enter port number. Selecting the
Anyoption will result in Fudo listening on all configured IP addresses. - In the External address field, enter an IP address (or FQDN name) along with the port number, under which Fudo One can be accessed from outside the local network.
- In the Fudo public key field, upload (optionally provide encryption passphrase) or generate TLS certificate.
- select the IP address from the Local address drop-down list and enter port number. Selecting the
- Click Save.
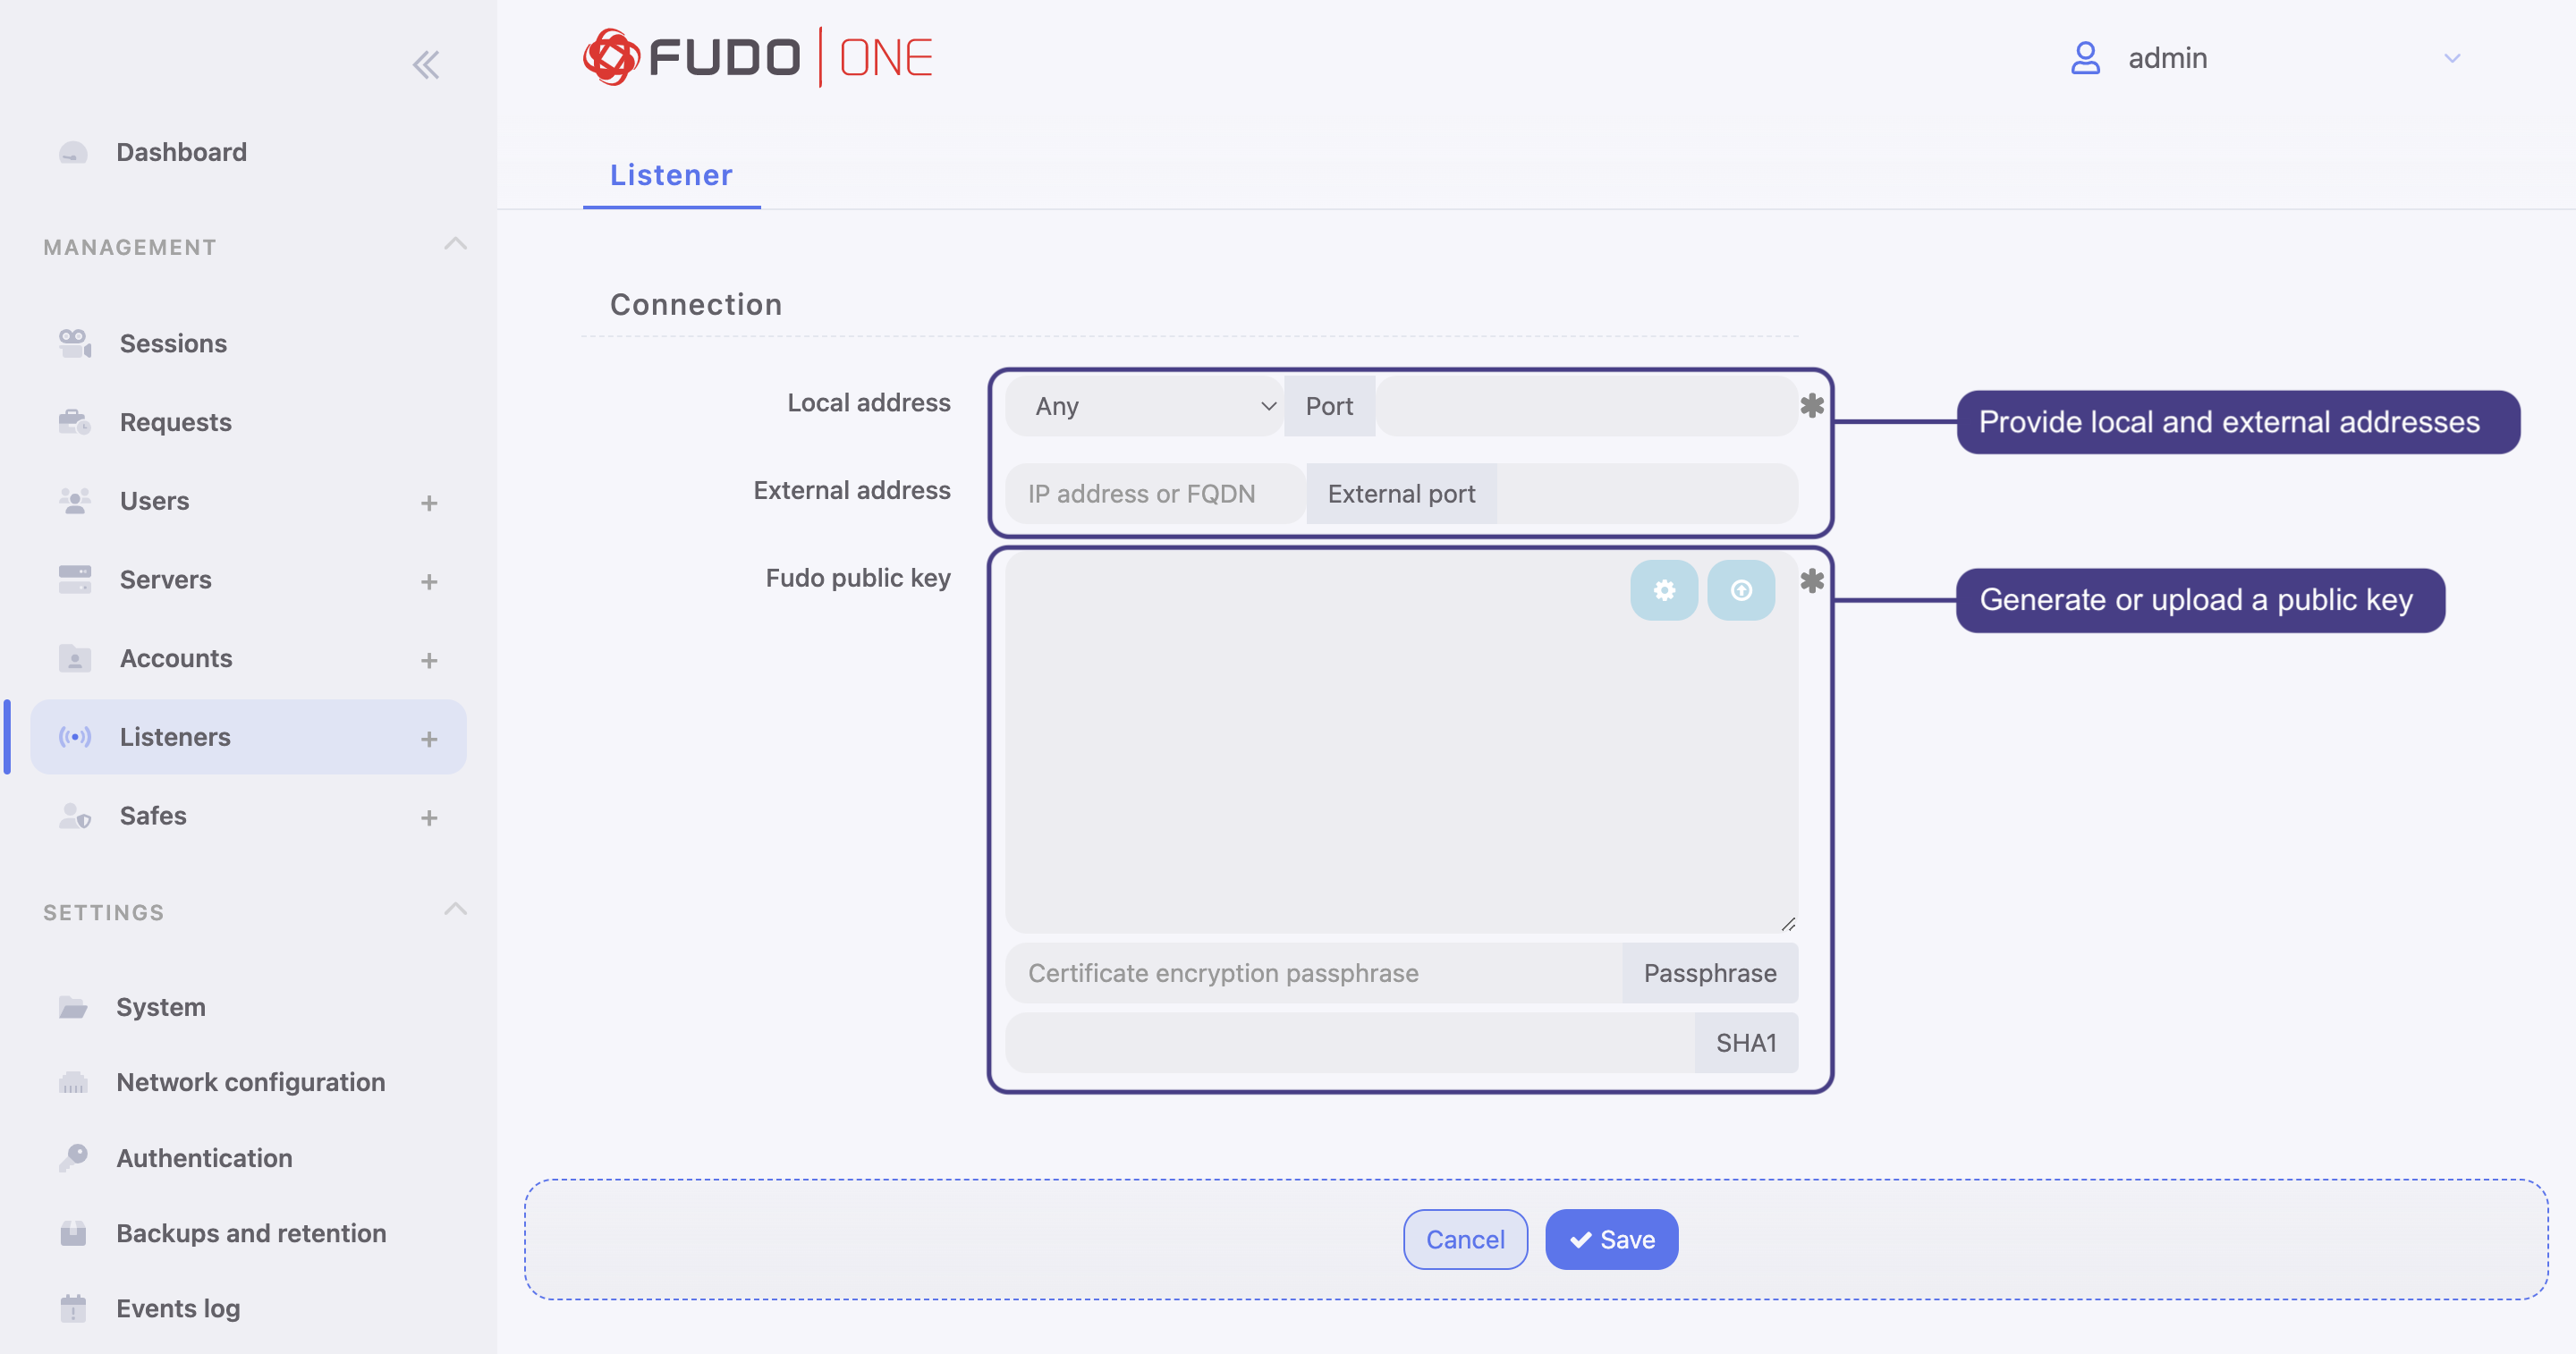
Connection settings of SSH listener
Creating a VNC listener
In order to create a VNC Listener, follow the instruction:
- Click + icon in the main menu next to the Listeners tab, or
Select Management > Listeners and then click Add. - Enter listener’s unique name.
- Select Blocked option to disable access to servers through this listener after it’s created.
- Select
VNCfrom the Protocol drop-down list. - Select the Case insensitivity option to disable case sensitivity in the username string when connecting over this listener.
- In the Announcement field, type in the announcement that will be presented to the user on the login screen.
- In the Connection section,
- select the IP address from the Local address drop-down list and enter port number. Selecting the
Anyoption will result in Fudo listening on all configured IP addresses. - In the External address field, enter an IP address (or FQDN name) along with the port number, under which Fudo One can be accessed from outside the local network.
- select the IP address from the Local address drop-down list and enter port number. Selecting the
- Click Save.
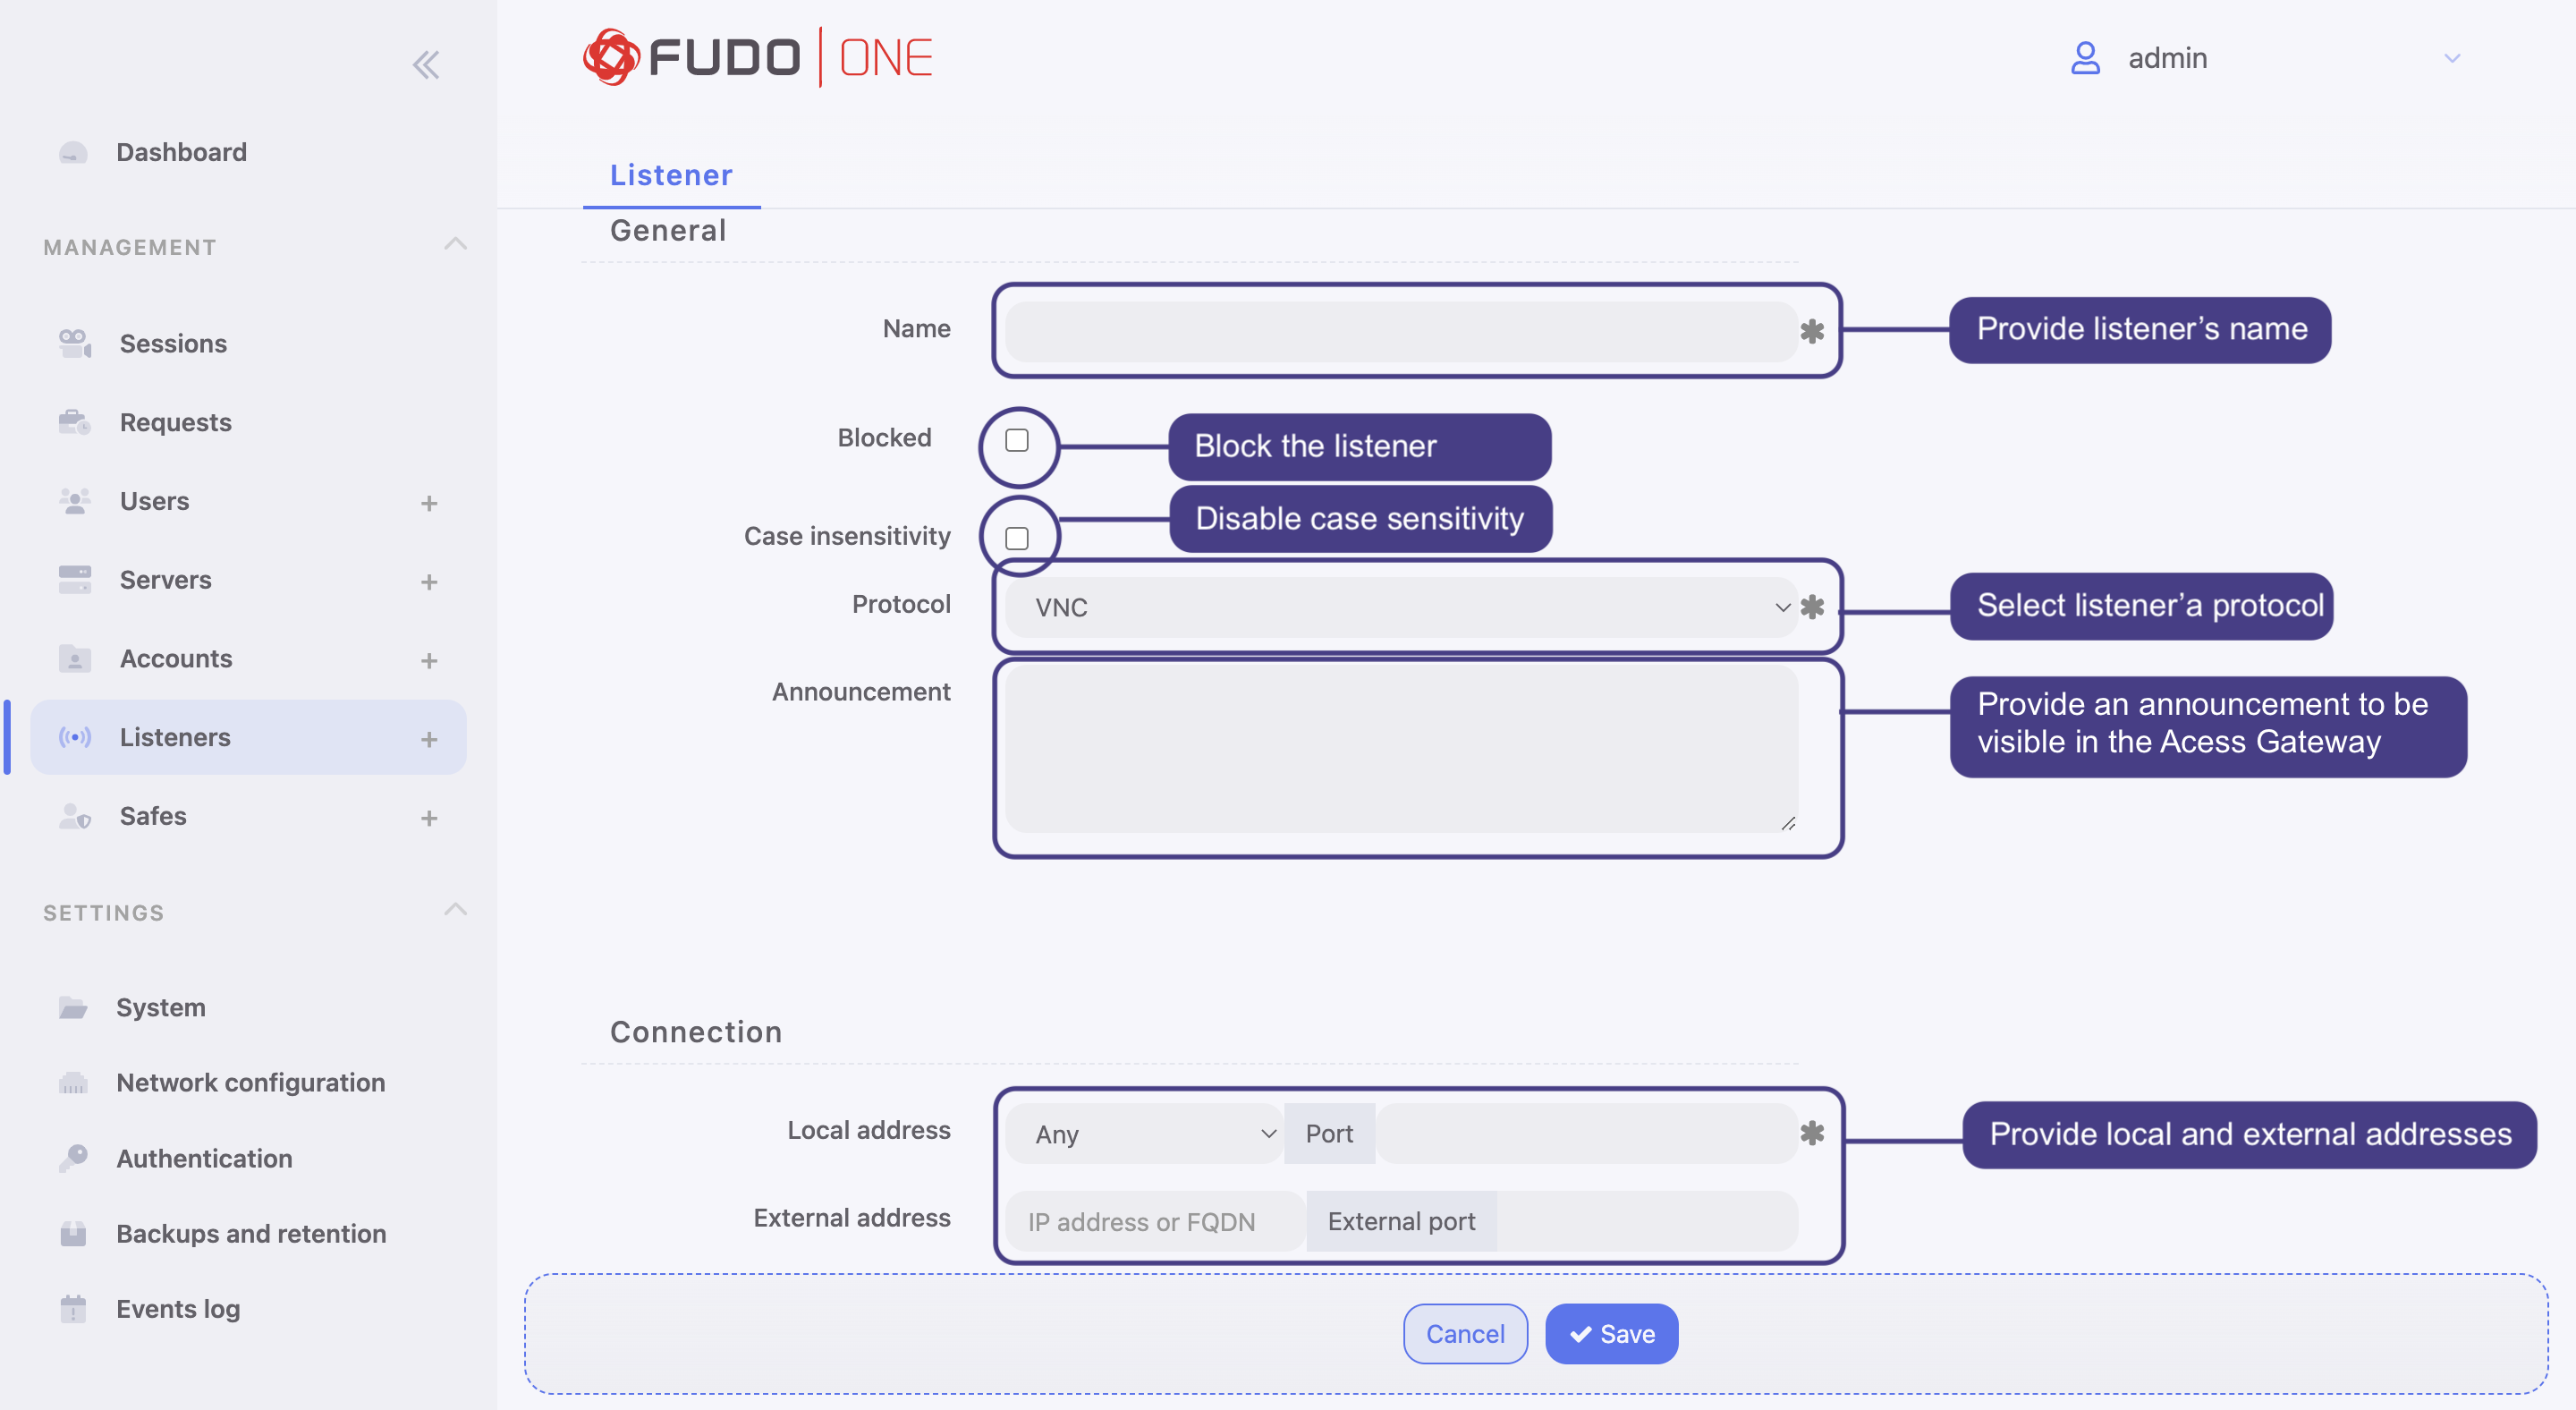
Settings of VNC listener
Blocking a Listener
In order to block a Listener, follow the instruction:
- Select Management > Listeners.
- Define filters to limit the number of objects displayed on the list, or use a search bar.
- Select the listener(s) you want to block and click the Block button.
- Optionally, provide the reason and click the Confirm button.
Alternatively, enter the Listener definition edit mode and click the Blocked button there. Provide an optional blocking reason.
Click Save.
Unblocking a Listener
In order to unblock a Listener, follow the instruction:
- Select Management > Listeners.
- Define filters to limit the number of objects displayed on the list, or use a search bar
- Select the listener(s) and click Unblock.
- Click Confirm to unblock selected Listener objects.
A Listener object can also be unblocked from the Listener definition edit mode:
- Find the Listener object and open its definition.
- Uncheck the Blocked option.
- Click Save.
Deleting a Listener
In order to delete a Listener, follow the instruction:
- Select Management > Listeners.
- Define filters to limit the number of objects displayed on the list.
- Select the listener(s) and click Delete.
- Click Confirm to remove selected Listener objects.
Updated 10 months ago
