
Network Configuration
Network interfaces configuration
System settings are available for a user with
superadminrole only.
Fudo One allows managing physical interfaces and defining IP addresses.
Defined IP addresses are physical interface’s aliases, which are used in server’s configuration procedures (Local address field in proxy configuration).
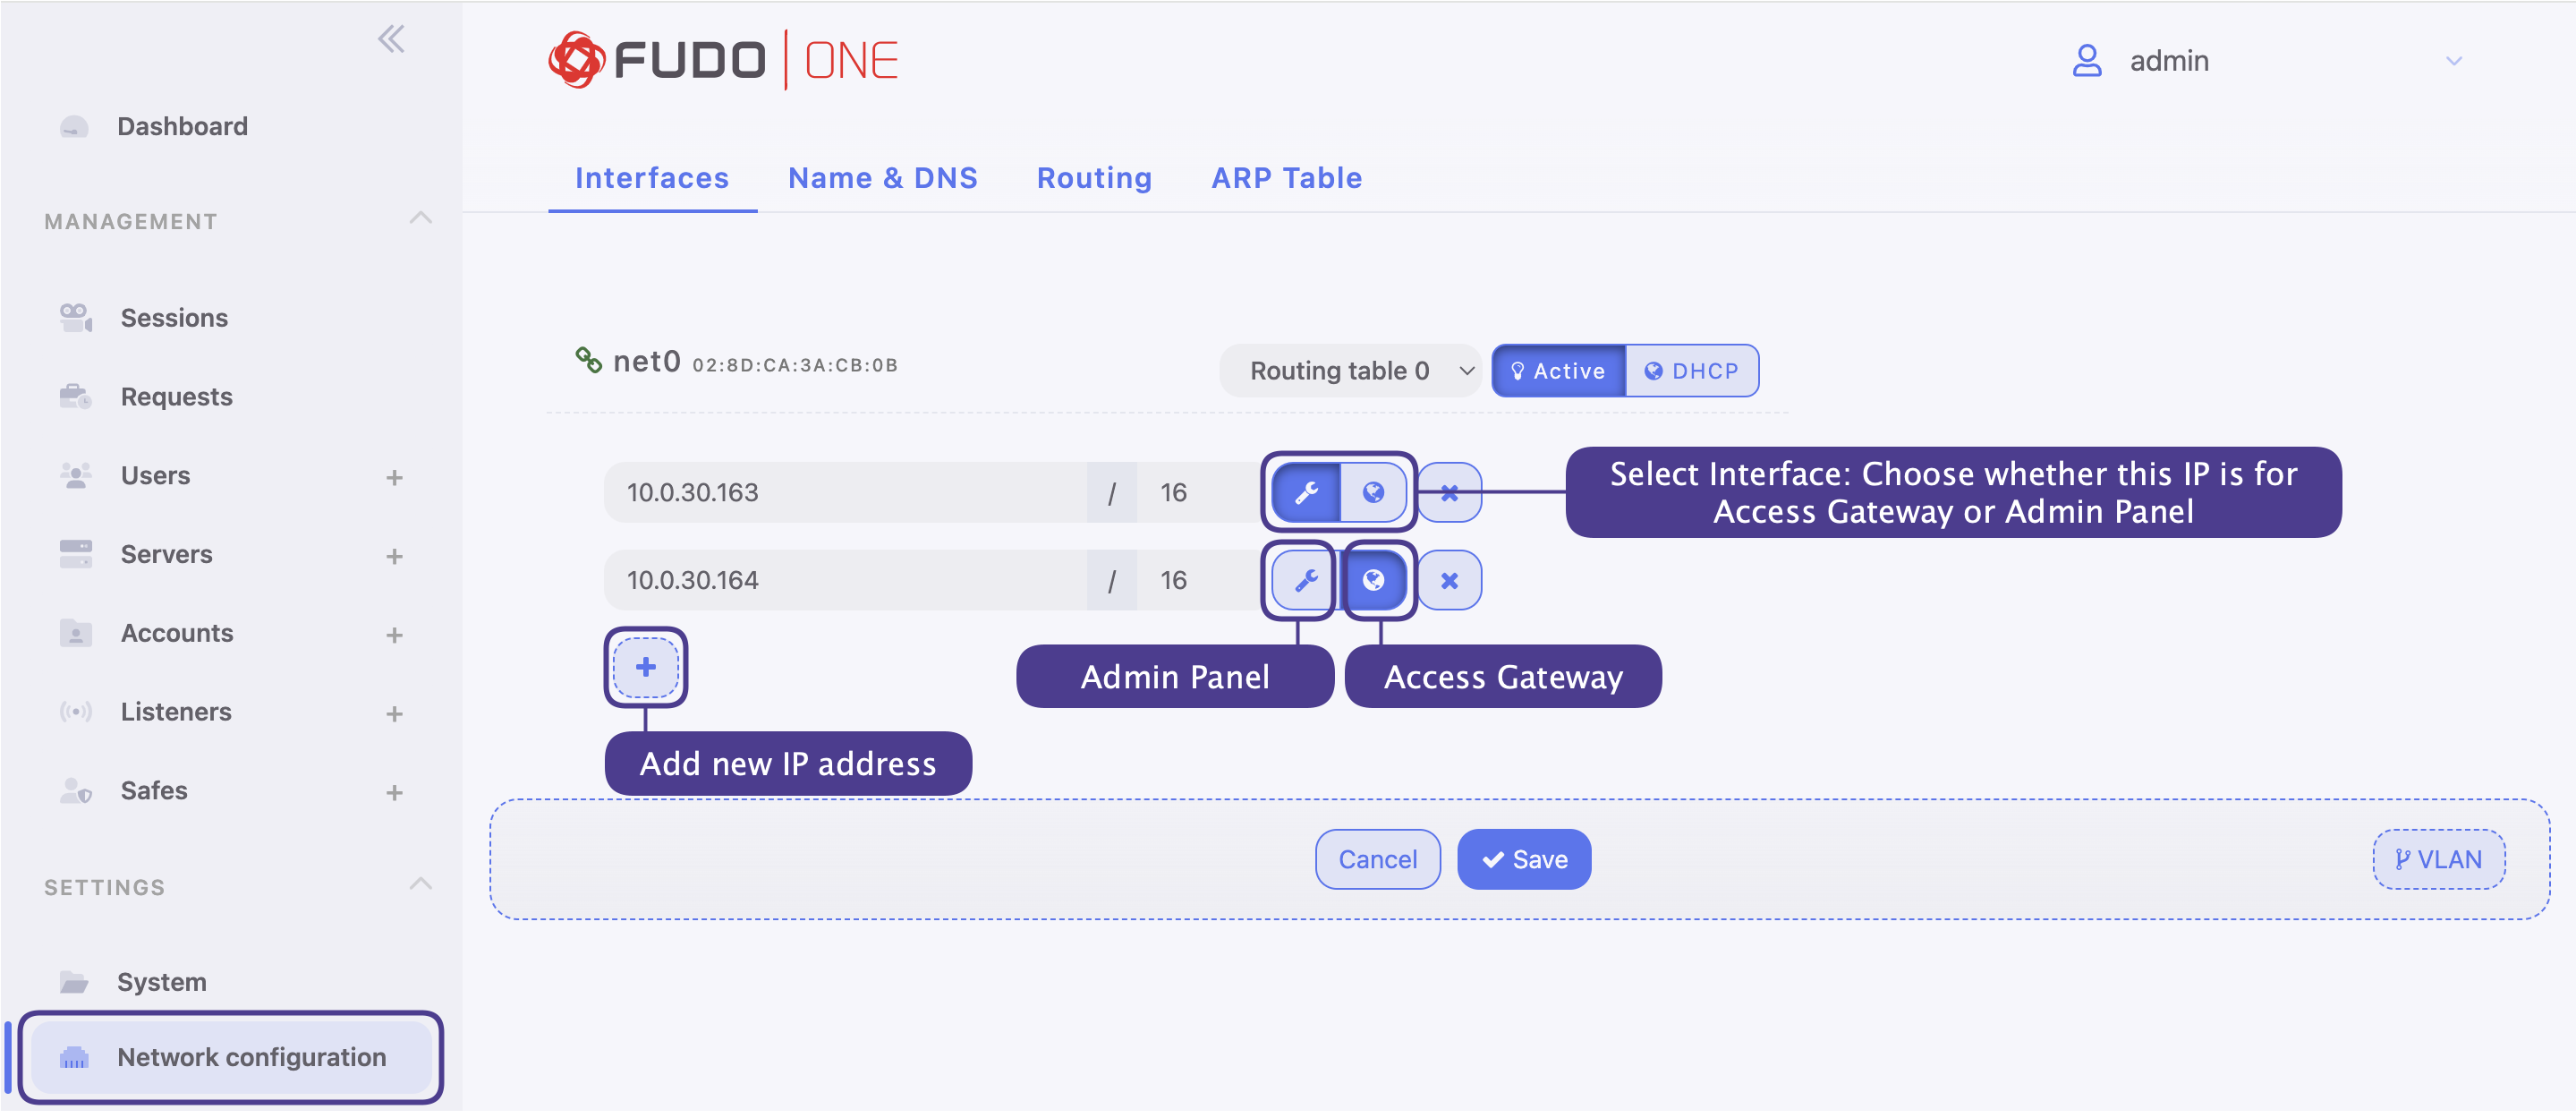
Defining of an IP address
To define an IP of a physical network interface, proceed as follows.
-
Select Settings > Network configuration.
-
Click the + button and provide IP address and subnet mask in CIDR format.
-
Select additional options for the IP address being defined.
- Enable access to administration panel on given IP address. Note that the management IP address is also used as service access over SSH protocol (using the default port 65522).
- Enable access to Access Gateway on given IP address.
-
Click Save.
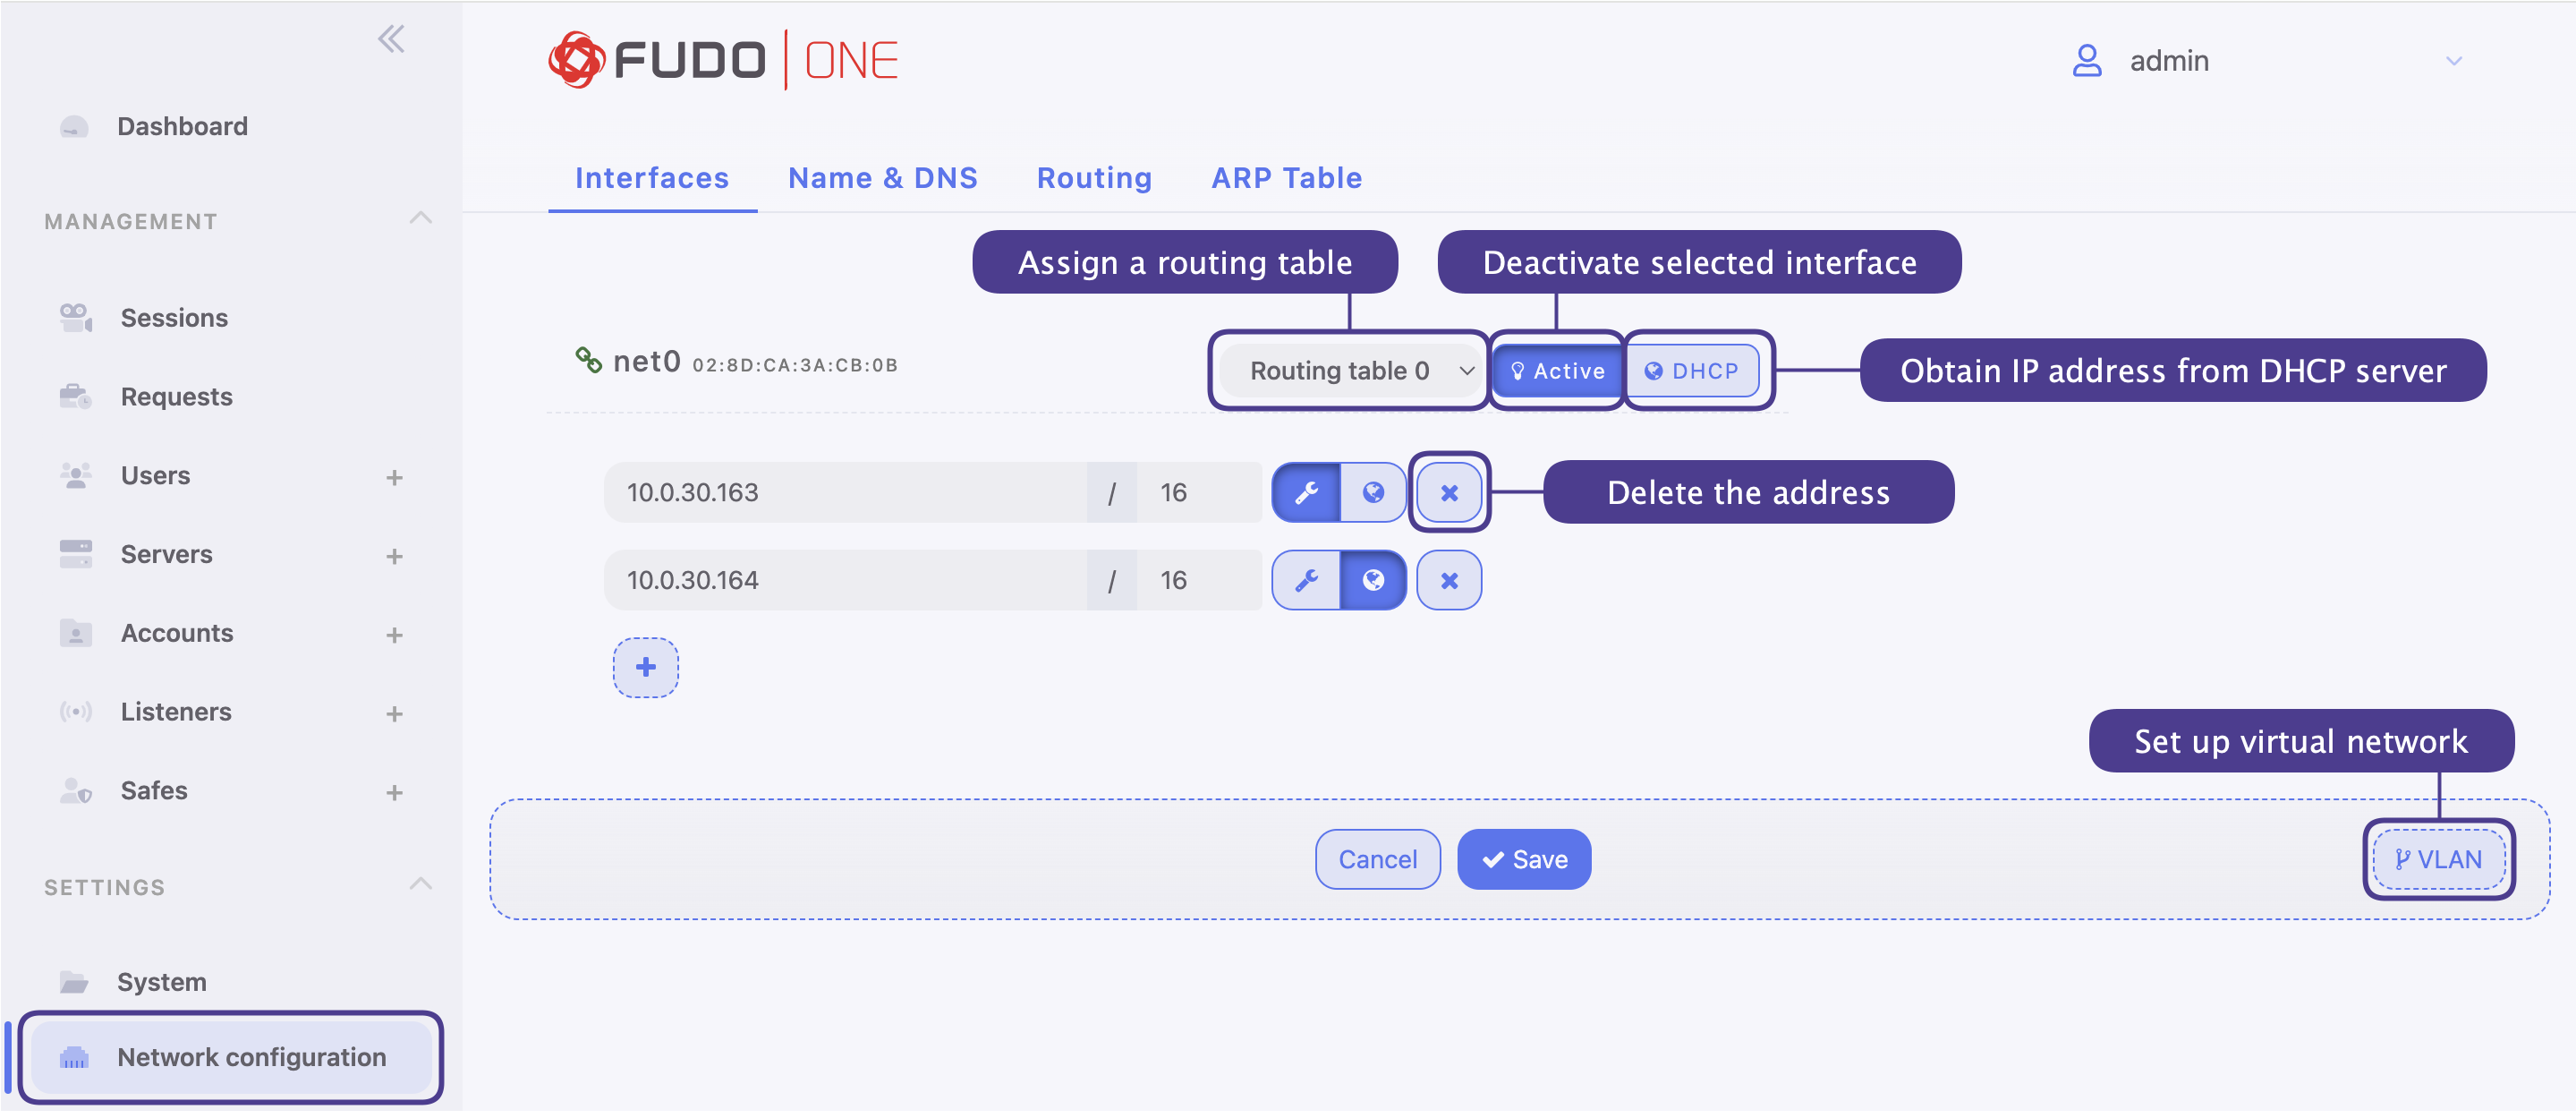
Removing defined IP addresses
Deleting of an IP address disables access to servers which had this IP configured in the local address of the proxy server.
To delete an IP address assigned to a given network interface, proceed as follows.
- Select Settings > Network configuration.
- Select the x option by the desired IP address.
- Click Save.
Disabling network interface
To deactivate a network interface, proceed as follows.
- Select Settings > Network configuration.
- Click Active next to given interface to deactivate it.
- Click Save.
Interface settings
Virtual networks (VLANs) configuration
VLAN networks allow separating broadcast domains.
To configure a VLAN on , proceed as follows.
- Select Settings > Network configuration.
- Click the VLAN option.
- Select the physical interface and define VLAN ID.
- Add IP addresses to given VLAN.
Select the DHCP option, to obtain IP address from a DHCP server.
- Click Active to activate defined VLAN.
- Click Save.
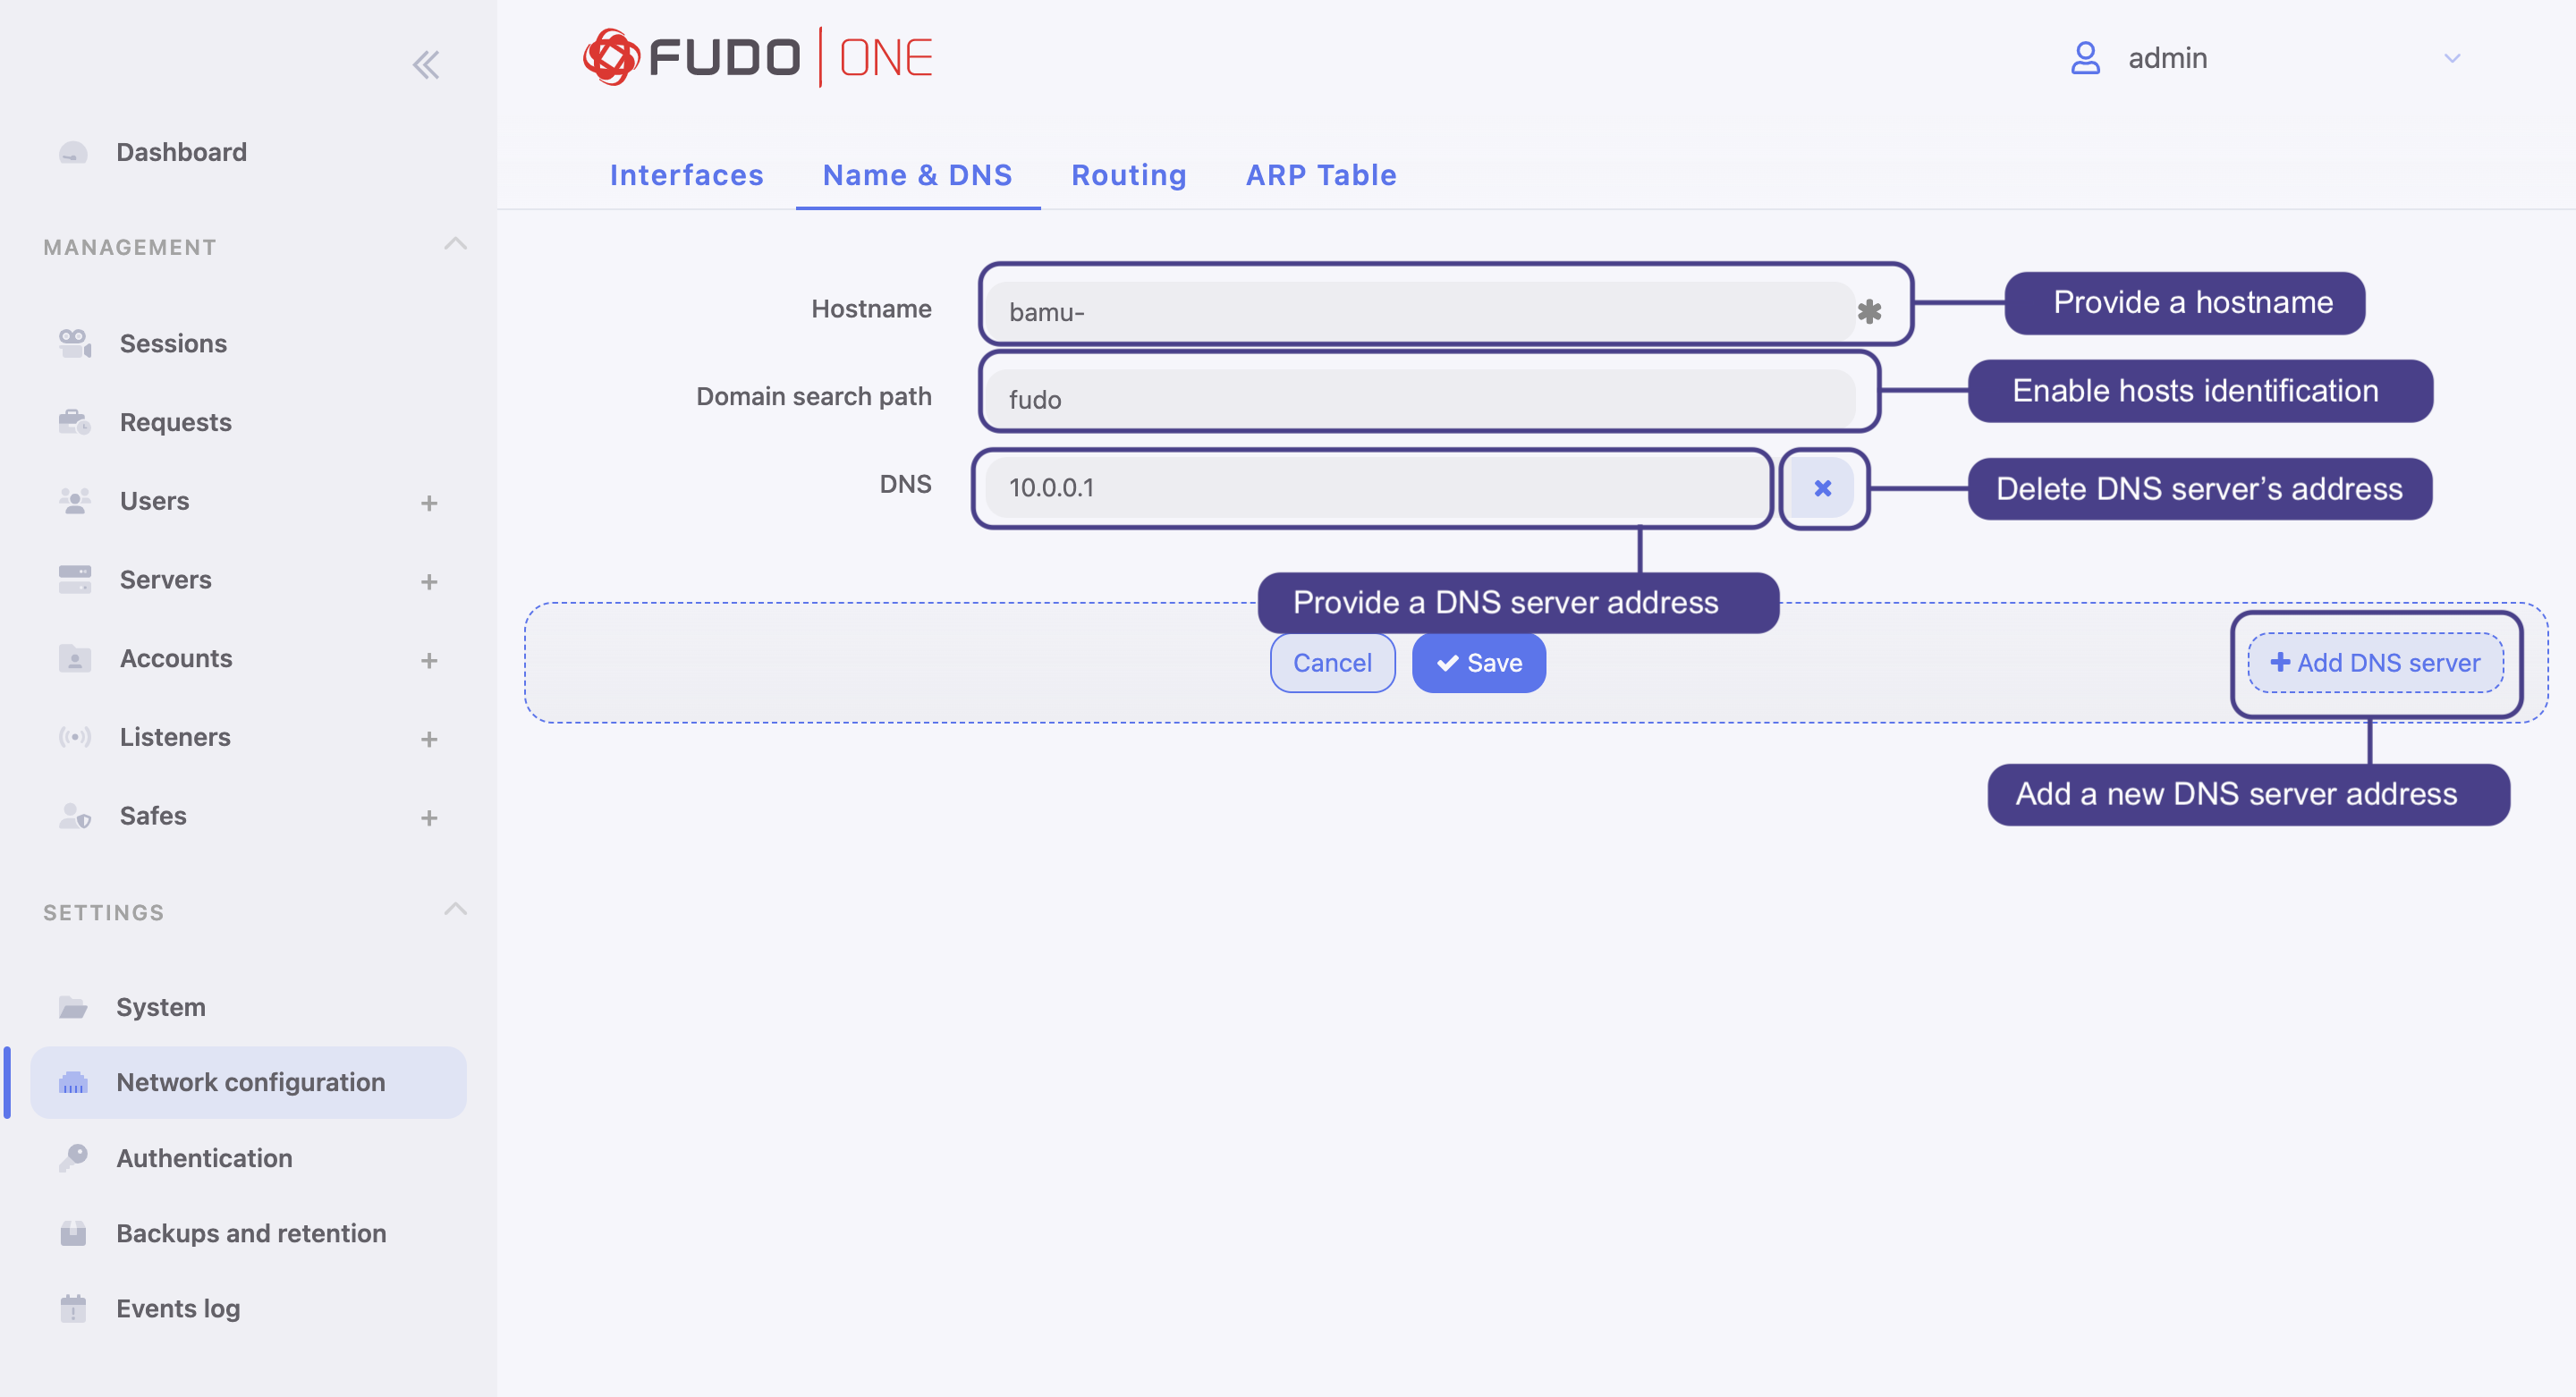
DNS configuration
DNS servers enable using mnemonic hosts names instead of IP addresses when configuring various network resources.
Defining domain search path
Domain search path enables convenient hosts identification based on short names. For example, defining tech.whl as the domain search path, enables defining target host as ftp instead of ftp.tech.whl.
To define a domain search path, proceed as follows.
- Select Settings > Network configuration > Name & DNS tab.
- Enter the domain search path.
- To define more than one value, enter desired values separated by space character. E.g.
tech.whl wheel.com.- Protocol implementation enables defining up to six domain search paths.
- Click the Add DNS server button to add more DNS server definitions.
- Click Save.
Deleting a DNS server definition
Deleting a DNS server definition may cause interruptions in device operation, if system configuration uses hosts names instead of IP addresses.
To delete a DNS server definition, proceed as follows.
- Select Settings > Network configuration > Name & DNS tab.
- Find and select given DNS server definition.
- Click the x button.
- Click Save.
DNS settings
Routing configuration
In default configuration, Fudo One directs all incoming traffic to defined gate. Static routing enables defining routes for packets coming from selected networks.
When defining default route, enter
defaultin the Network field.
Adding a route
There are 7 routing tables available for configuration, with multiple routes.
To add a route, proceed as follows:
- Select Settings > Network configuration > Routing tab.
- Click Add route to define a new route.
- Enter network address along with the network mask (e.g.
10.0.1.1/32) and gateway address. - Click Save.
Deleting a route
To delete a route, proceed as follows:
- Select Settings > Network configuration > Routing tab.
- Find desired route entry and click the x button.
- Click Save.
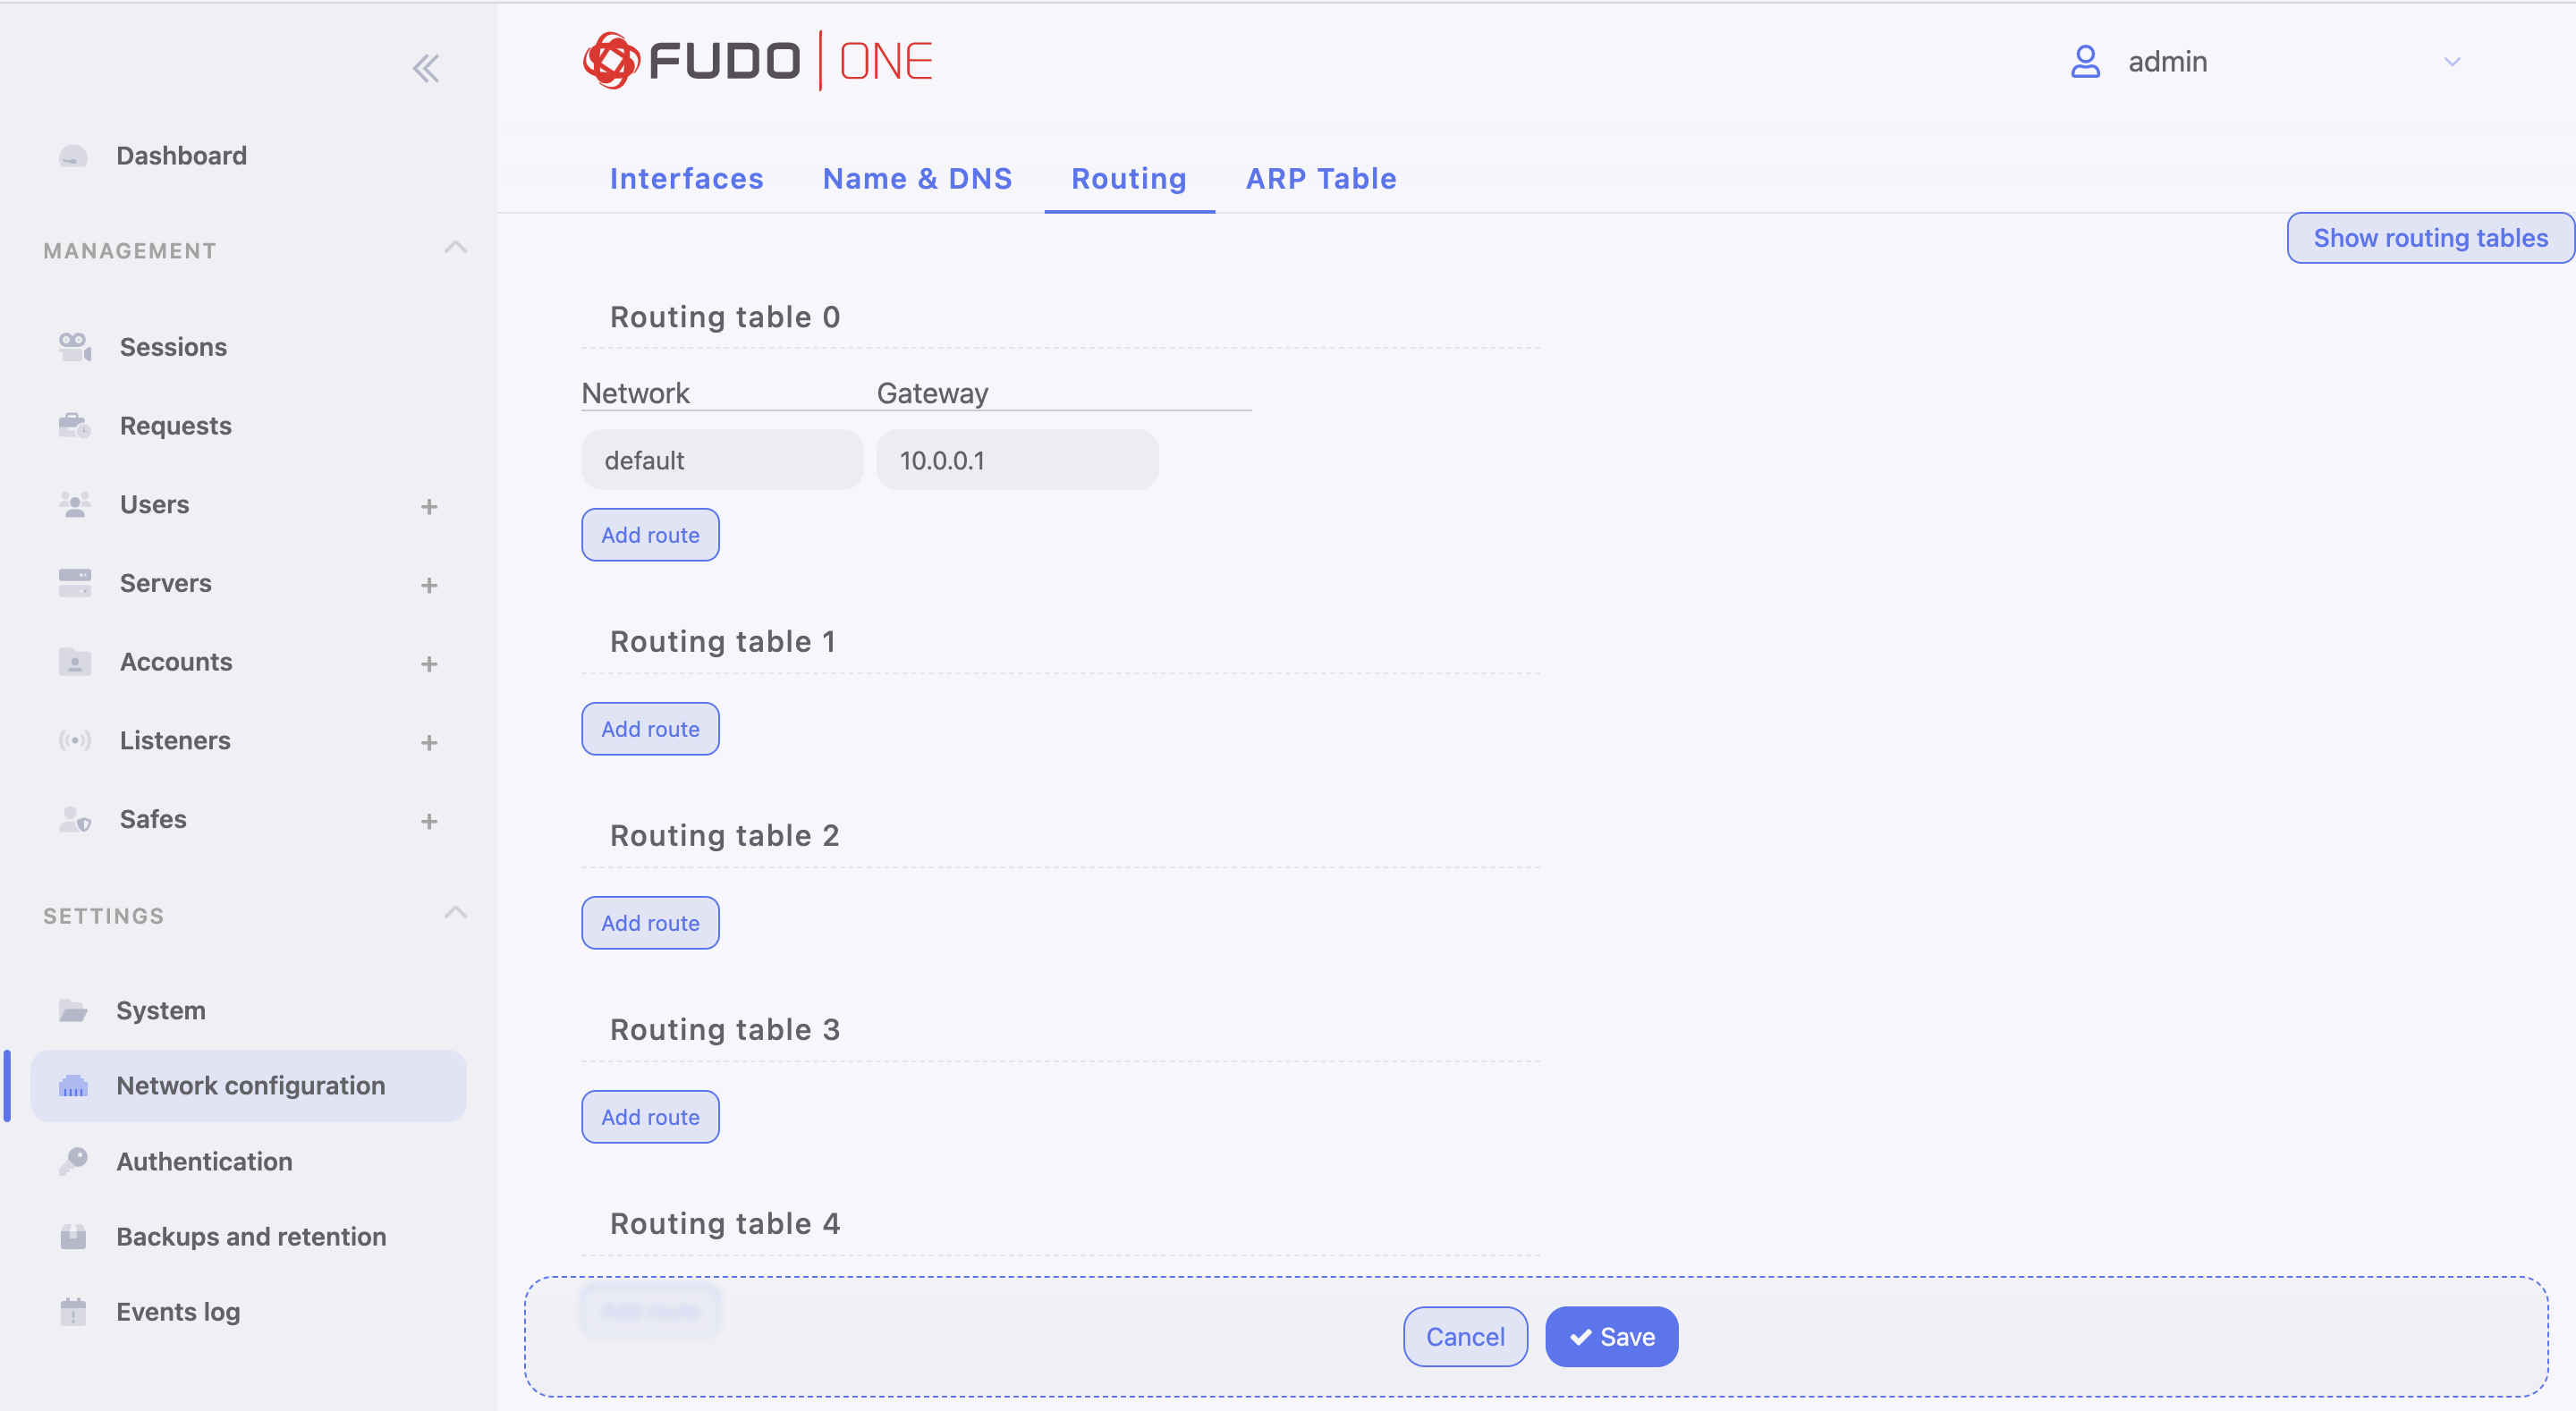
Routing tables configuration
ARP table configuration
Adding an ARP entry
Adding an entry to ARP table can resolve network communication issues.
To add an ARP entry, proceed as follows.
- Select Settings > Network configuration > ARP table tab.
- Click Add to define a new ARP table entry.
- Enter IP address and corresponding MAC address.
- Click Save.
Deleting an ARP table entry
Deleting an ARP table entry may cause system malfunction due to network communication issues.
To delete an ARP entry, proceed as follows.
- Select Settings > Network configuration > ARP table tab.
- Find desired ARP entry and click x button.
- Click Save.
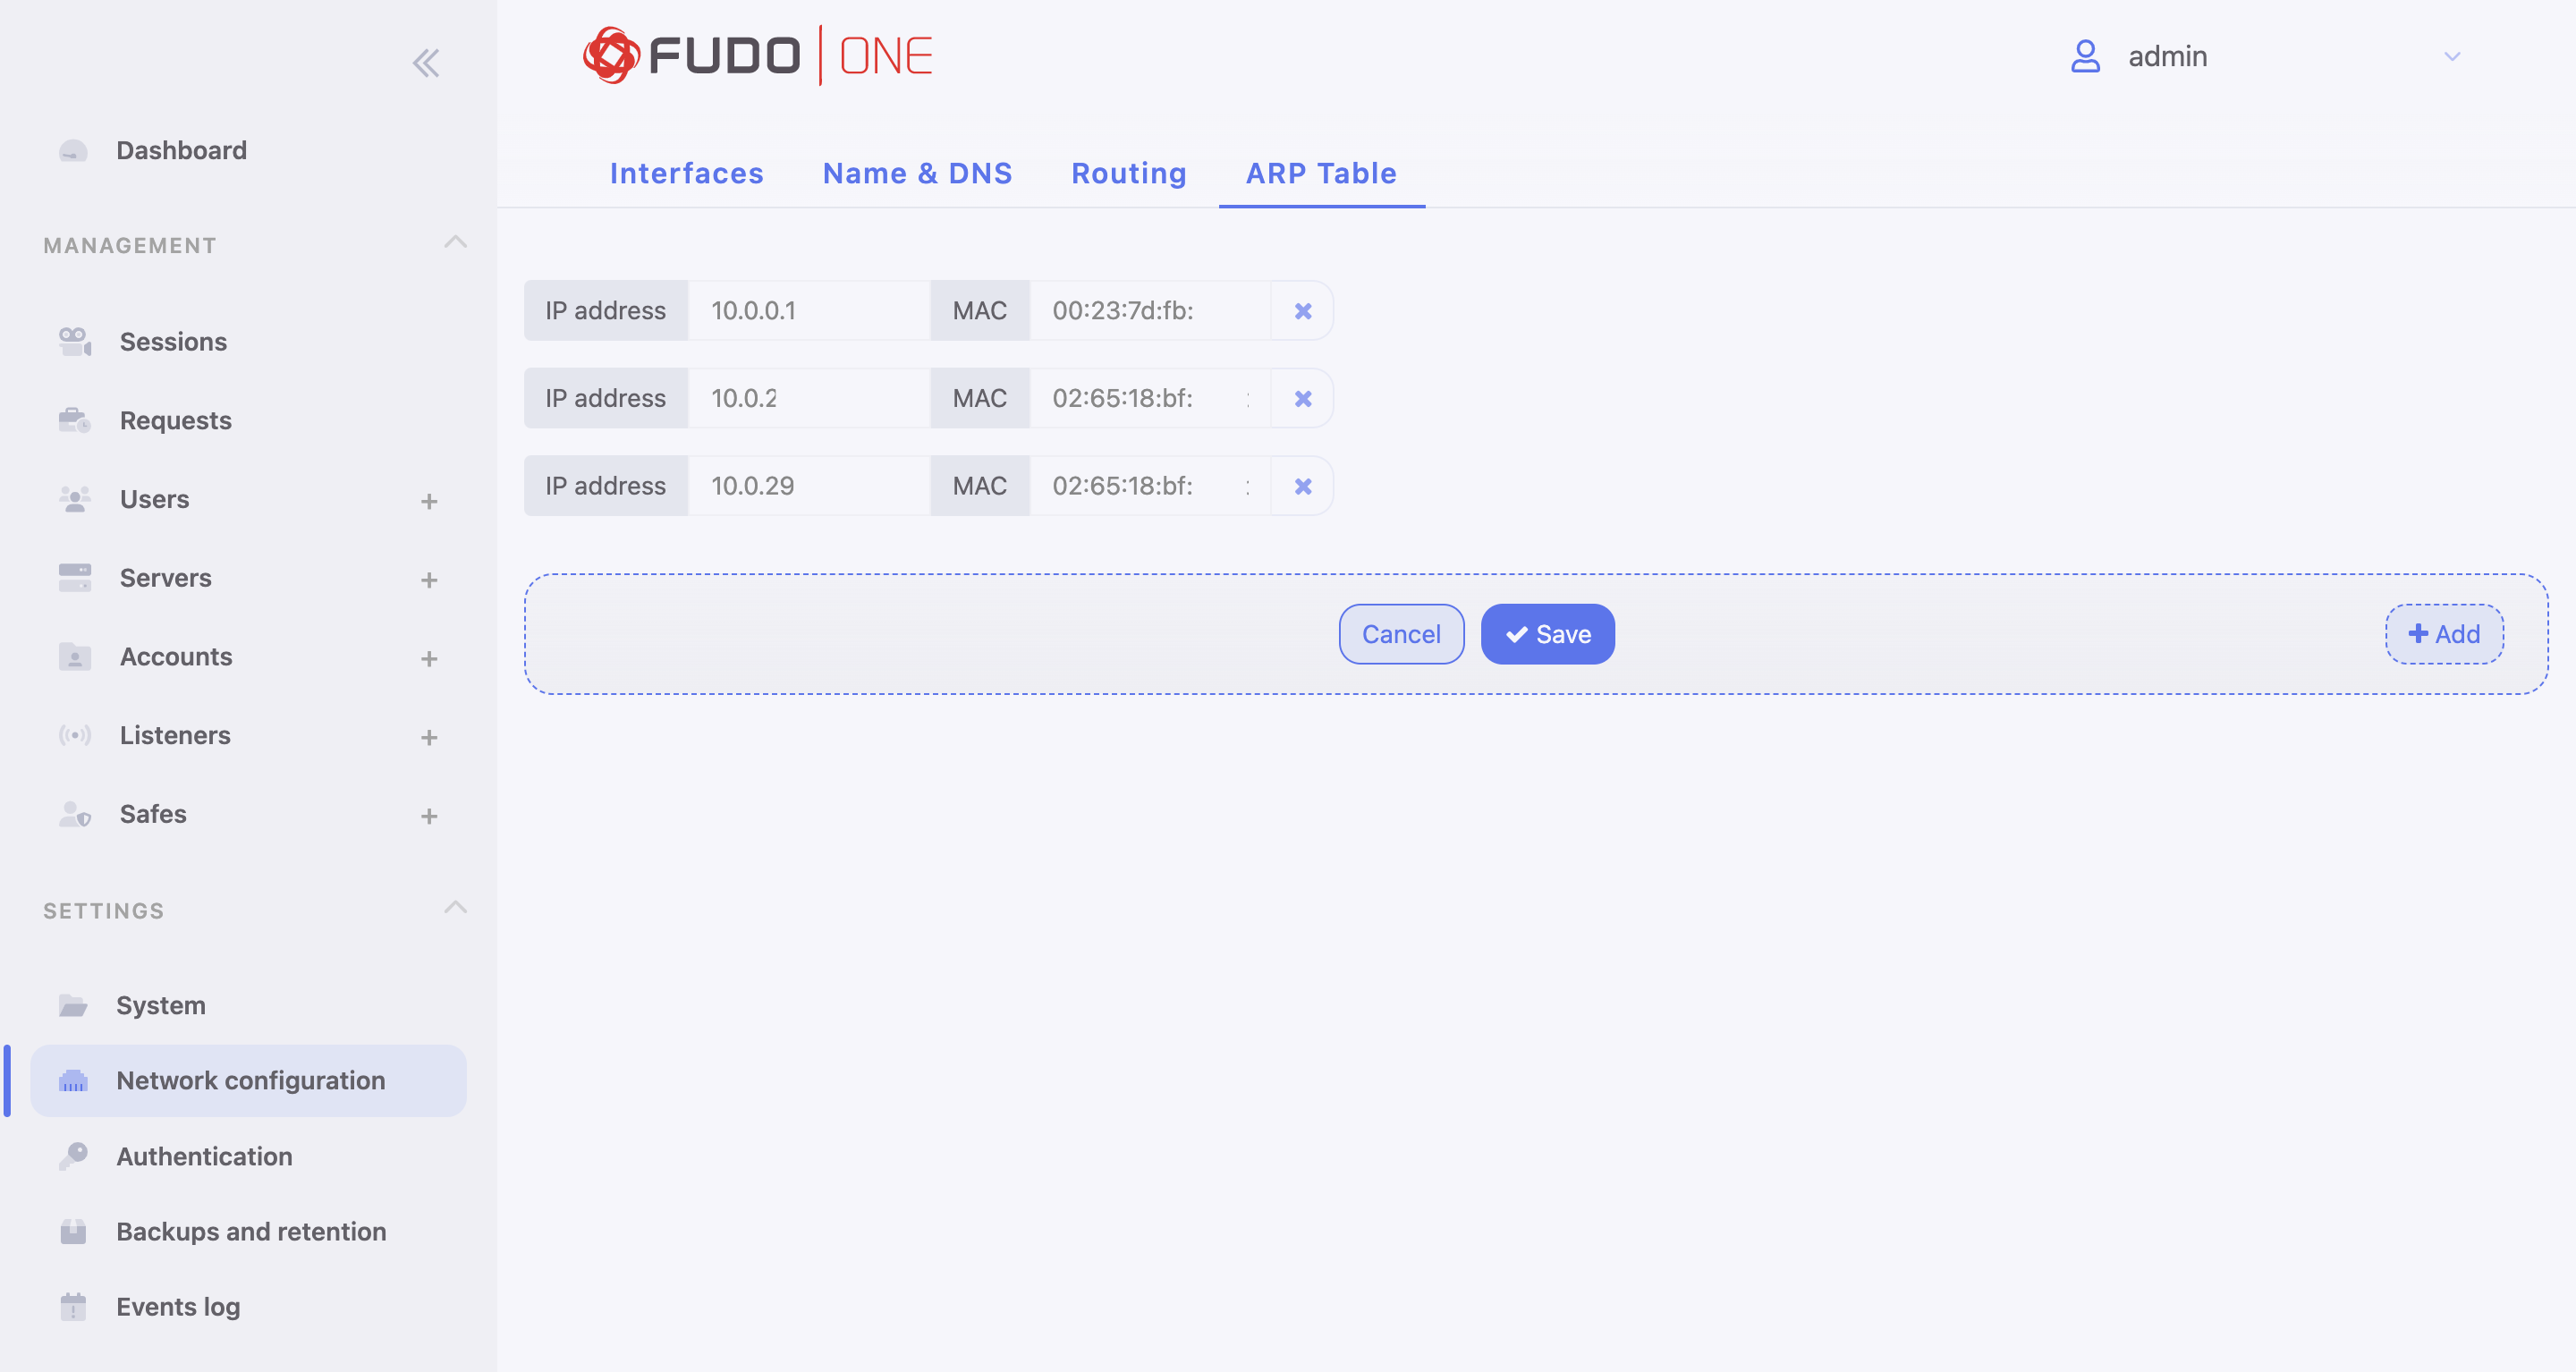
ARP Table settings
Updated about 1 year ago